and historical purposes, all rights reserved.
This page is copyright© by
This page may not be sold or distributed without
the expressed permission of the producer
I have no connection with any camera company.
If you find this manual useful,
how about a donation of
$3 to:
M. Butkus, 29 Lake Ave.,
High Bridge, NJ 08829-1701
and send your e-mail
address
so I can thank you.
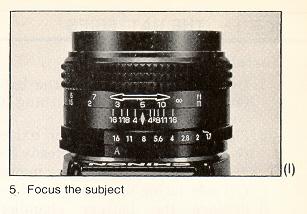
Most other places would charge
you $7.50 for
a electronic copy
or $18.00 for a hard to read Xerox copy.
buy new manuals, and pay their shipping costs.
It'll make you feel better, won't it ?
If you use Pay Pal, use the link below.
Use the above address for a check, M.O. or cash.
Back to main Camera Manual Site
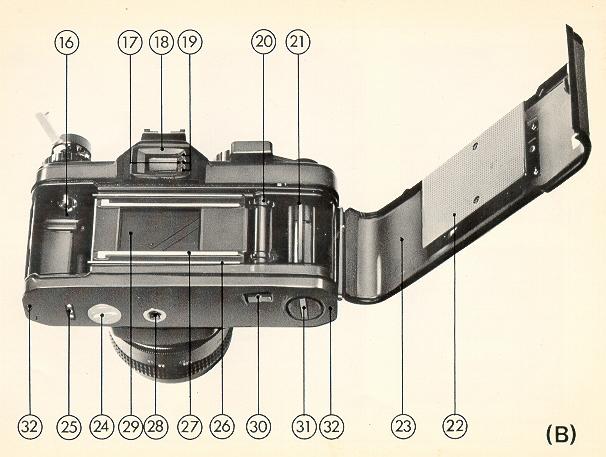
LED Promaster parts of
the camera
1. Shoulder strap eyelet 2 Frame counter 3 Shutter release / exposure meter switch 4 Shutter release lock lever 5 Film advance lever 6. Shutter speed dial 7. Accessory shoe (hot shoe) 8. Battery test button 9. Film rewind knob / back cover opener 10. Film speed dial (ASA/DIN) 11. Self timer 12. Aperture ring 13. Depth of field scale 14. Focusing ring 15. X synchro-flash socket 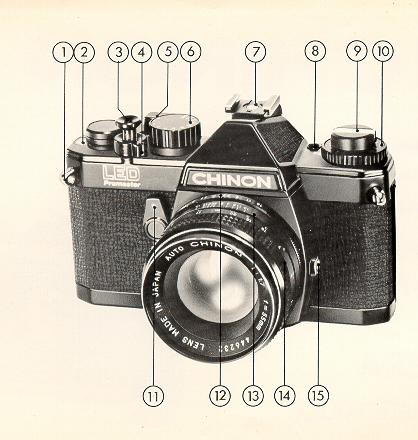
|
16. Film chamber 17. Battery check lamp 18. Viewfinder eyepiece 19. Exposure indicator LED's 20. Sprocket teeth 21. Take-up Spool 22. Film pressure plate 23. Film chamber cover |
24. Battery compartment cover 25. Power Winder electrical contacts 26. Film guide rail 27. Film rail 28. Tripod socket 29. Shutter 30. Rewind button 31. Power Winder coupling cover 32. Power Winder guide pin receptacle |
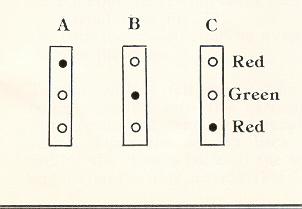
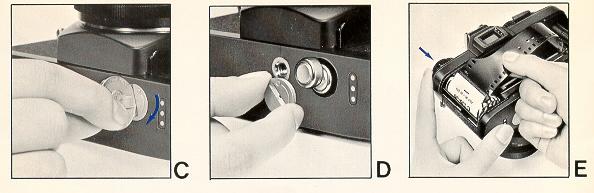
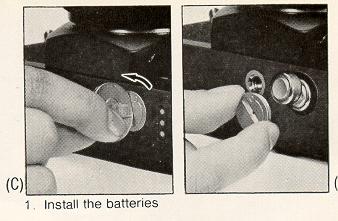
| This is a basic Auto expose metering/camera, just like C needle
match but with LED. Uses standard button batteries (x2, bumps
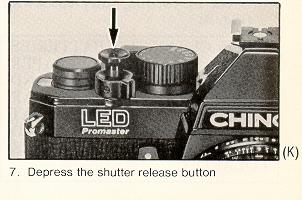
towards the cover) are needed to run the meter. Depress the
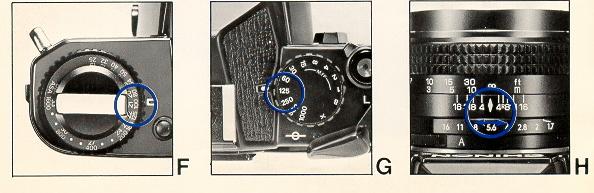
shutter half way to turn on the meter. 3 LED lights will determine
if the current setting are enough exposure for the ASA setting and light
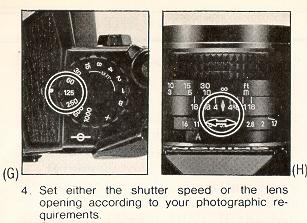
coming through the lens. Moving the aperture or shutter speed to
get the GREEN LED by the viewfinder to light. Top RED if over
exposed (less light), lower RED if under exposed (needs more light).
If you find a setting, you can use the "one stop" rule. e.g. If you get a GREEN light at 1/500 and F5.6 making sure your camera ASA is set at your film ASA, you can use F8 at 1/250 (less light, slower shutter speed) or even use F11 at 1/125. You should change your setting and confirm the exposure is still correct via the meter. Your viewfinder will dim when metering as the aperture of the lens closes to the F-stop setting on the lens. |
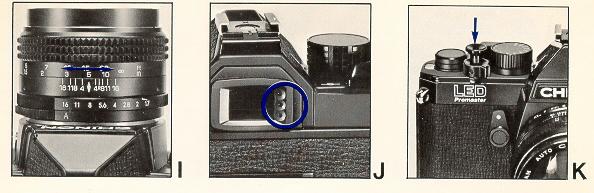

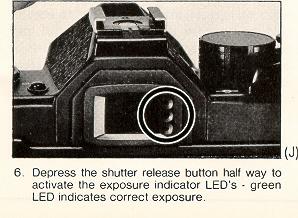
(Webmaster: LED in column B should light. Changing the shutter
speed or lens
aperture is need to get the correct exposure.