and historical purposes, all rights reserved.
This page is copyright© by
This page may not be sold or distributed without
the expressed permission of the producer
I have no connection with any camera company
This camera manual library is for reference
and historical purposes,
all rights reserved.
This page is copyright© by ![]() ,
M. Butkus, NJ.
,
M. Butkus, NJ.
This page may not be sold or distributed without
the
expressed permission of the producer
I have no connection with any camera company
On-line camera manual library
If you find this manual useful,
how about a donation of
$3 to:
M. Butkus, 29 Lake Ave.,
High Bridge, NJ 08829-1701
and send your e-mail
address
so I can thank you.
Most other places would charge
you $7.50 for
a electronic copy
or $18.00 for a hard to read Xerox copy.
This will help me to continue to host this site,
buy new manuals, and pay their shipping costs.
It'll make you feel better, won't it ?
If you use Pay Pal, use the link below.
Use the above address for a check, M.O. or cash.
Back to main camera manual page
CLICK HERE TO CONTINUE TO
COSINA CT-1A PDF
MANUAL MADE FROM THIS FILE
COSINA CT-1A / COSINA 1G Bedienungsanleitung
COSINA CT-1A / COSINA 1G Mode D'Emploi
COSINA CT-1A / COSINA 1G istruzioni per l'uso
COSINA CT-1A / COSINA 1G Manual de Instrucciones
Welcome to the exciting world of COSINA. Your new camera is one of a
family of professional
quality cameras designed with the serious photographer in mind. And
the name COSINA is your
assurance of superbly crafted optics and outstanding mechanical performance
and reliability.

1. ESSENTIAL SPECIFICATIONS
Type: 35mm SLR TTL match LED measurement system.
Film: Picture Size: 35mm, J135 24X36mm
Lens Mount: K type bayonet mount
Shutter: Metal focal plane shutter 1/1000 to 1 (seconds) and B.
Self-Timer: Approx. 10 seconds duration, mechanical operation.
Field of View: 93% vertical and 93% horizontal coverage of the actual picture field.
Magnification: 1.0.86 (with a standard 50mm lens.)
Focusing: Horizontal split-image center spot with surrounding microprism collar on matte type fresnel screen.
Light Metering System: Open-aperture TTL metering system. Match LED, display with over and under exposure warnings. Center weighted measurements with CdS.
Exposure Range: EV3-18 (ASA 100)
ASA of Film: ASA 25 to 1600
Synchronization Contact: X contact
Accessory Shoe: Hot Shoe
Film Advance Lever: Single lever stroke with 135° throw and 30~ stand-off
Frame Counter: Additive type with automatically resets
Film Rewinding: Rewind crank type
Mirror: Quick-return mirror
Back Cover Opening: Hinged by pulling the rewind knob up
Power Source: Two S-76, A-76, G-13
Size and Weight: 133x85x48mm, 450g (only body)
(Subject to change without notice.)
2. Loading the Battery
Two S-76, A-76, or G-13 batteries are employed for this camera.
1. The battery chamber cover can be opened by turning it counter clockwise with a coin.
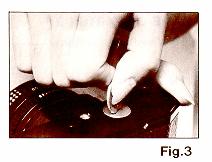
2. Load the batteries correctly according to the indication of the polarities in the battery chamber.
(if the batteries are loaded incorrectly with the reverse polarities, the LED in the viewfinder does not light.)
3. Turn tightly the battery chamber cover clockwise.
Be careful not to contaminate the surface of the batteries with sweat or oil when loading the batteries. If contaminated batteries are loaded,
it causes an improper contact. When the batteries are contaminated, wipe off the dirt with dry cloth. Unload the batteries when the camera is not
used for a long period. The batteries should last for approximately one year under normal use. When the camera has been used over one year, replace
the old batteries with new one.
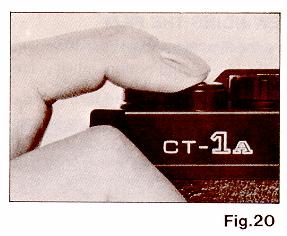
3. Main Switch/Shutter Release Lock
When depressing the shutter release button half-way down, main switch comes on.
As the film advance lever is also functioning as release lock, return
the lever to its stocked position to avoid wasting battery power when not using the camera.
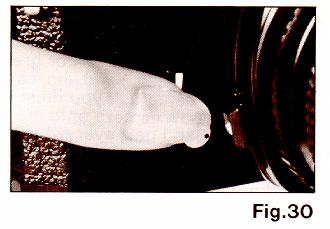
4. Loading the film
The COSINA CT-1A uses color or black and white film in standard 35mm (J135 24mm X 36mm) film.
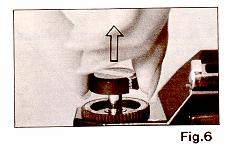
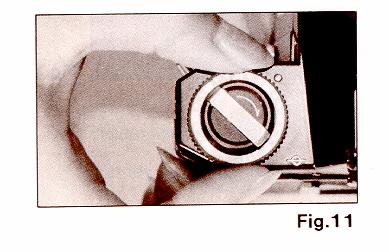
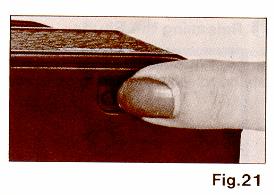
1. Pull up the rewind knob, and pull it up stronger. Then the back cover will open.
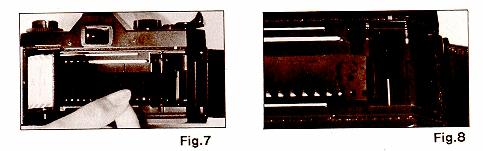
2. Put the film into the film chamber as indicated in the photograph, and press down the rewind shaft to the original position while rotating the rewind knob.
3. Insert the film leader into the groove of the spool, and engage the perforations of the film in the teeth of the spool.
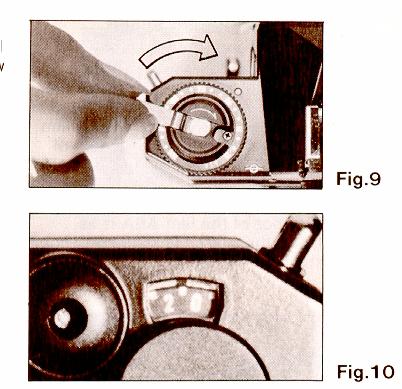
4. Turn the film advance lever and wind the film around the take-up spool making sure that the perforations of the film are engaged in the teeth of the sprocket.5. Close the back cover and press it strongly, and it will be automatically locked. Tilt up the film rewind crank, and gently turn it in the direction of the arrow until it stops to take up the film slack.
6. Advance the film a couple of times pressing the shutter button until the first exposure position ( 1 ) in the middle between O and 2 appears in the frame counter. The film is properly loaded if the film rewind knob rotates counterclockwise when the film advance lever is operated.
In case there is a film slack after the film is taken up on the spool, turn the film rewind crank in the direction of the arrow to obtain
proper film tautness, and then close the back cover. Avoid direct sunlight when loading the film. When pressing the shutter button, pull the film
advance lever. If the film advance lever is pushed to its stocked position, the shutter button will be locked. Accordingly, the shutter is not operated
in this state.
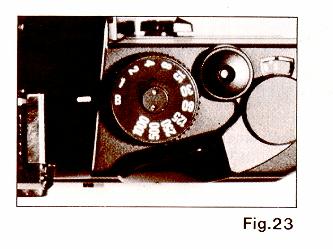
5. Setting the ASA Film Speed
After loading the film set the ASA film speed according to the ASA speed of the film in use. (The ASA rating recommended by the manufacturer is printed on the film box, e.g. ASA. . .)
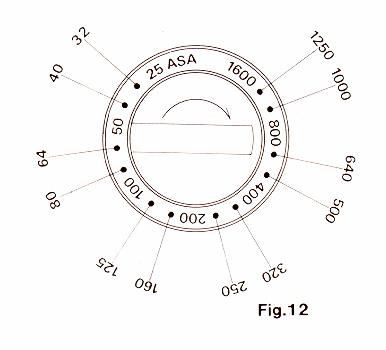
When using the film of ASA 100, for example, set the position 100 of the film speed setting dial to the film speed scale The dial number of the film ASA is as indicated, and there are clicks corresponding to the respective numbers.
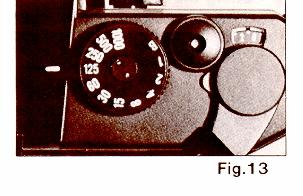
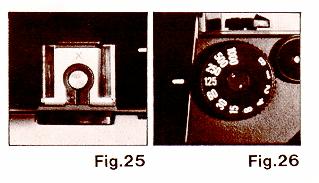
6. Setting the Shutter Speed
1. Turn the shutter speed dial in either direction until the desired number clicks into place on the white line of the body.
2. Accurate shutter speed cannot be obtained by the in-between setting of the shutter speed dial. Set the shutter speed so that the desired number clicks into place. At the "B" setting, the exposure meter cannot be used.
7. Setting the Exposure
Your COSINA CT-1A has a built-in LED system, which measures the light coming through the lens and enables you to set the proper exposure for a given lighting condition. Two sensitive cadmium Sulfide (CdS) cells, installed beside the eyepiece, read the light in the overall picture area and particularly the center weighted. This is very important in obtaining accurate exposure readings in scenes where there is an over-abundance of sky in the background or where backlighting or side lighting is present.
To take an exposure reading:
1. Winding of the Film Advance lever.8. Holding the camera2. Switch the meter on by gently pressing the shutter release button half-way down.
3. When one of the LEDs located at left side of the viewfinder lights, the meter circuit is powered by batteries.
4. When the red warning light (+) lights it is meaning of Over-exposure. In this case the diaphragm ring of the camera lens should be turned clockwise or the shutter speed dial should be turned to a higher speed until the green LED fights
5. When the red warning lamp ( - ) lights, it is meaning of Under-exposure. In this case the diaphragm ring of the camera lens should be turned counter-clockwise or the shutter speed dial should be turned to a slower speed until the green LED lights.
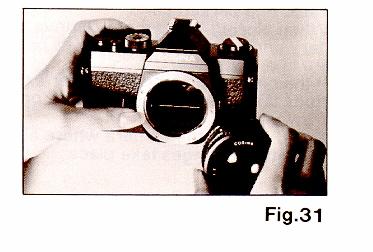
6. The proper exposure of film is obtained whenever the green LED lights.
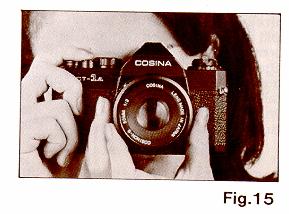
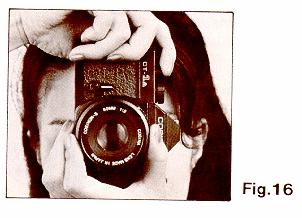
3. Press your left elbow lightly against your body and look into the viewfinder steadying the camera against your face. The right arm should be relaxed while holding the camera. Use the tripod when you use telephoto lenses or slow shutter speeds.
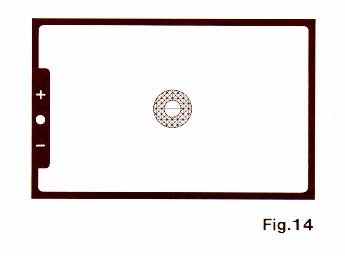
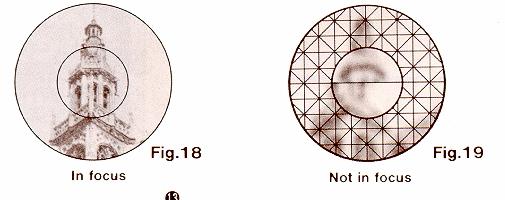
Focusing is taken from the small round area in the center of the view-finder screen. The inner circle is a split image range-finder and is surrounded
by a microprism. The split-image range-finder divides the image horizontally. When the two halves are brought into exact alignment, correct focusing
has been obtained. The outer microprism conveys a broken shimmering image when out of focus and becomes clear and sharp when correct focus is reached.

Accessories, such as a rubber eye-cup, eye piece correction lens holder, angle-finder and view-finder, magnifier can be used to assist focusing. Any photographic shop will advise you correctly on the use of these items.
10. Releasing the Shutter
When you press the shutter button, the aperture is throttled and the shutter screen is opened to allow the film to be exposed.
If the shutter speed is slower than 1/30 second, camera shake tends to occur. Hold securely the camera in this state, and press the shutter
button slowly. It is recommended to use the tripod and the cable release when using a slow shutter speed. When using the tripod, never forcibly
screw the long legs at the threaded portions. it will cause a trouble. (Use the tripod of the screw of 5.7 mm long (5.5 mm in the JIS).) Never
move the shutter speed dial while depressing the shutter button and operating the shutter. It will affect the accurate shutter speed and the correct
exposure of the film.
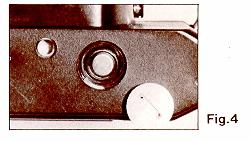
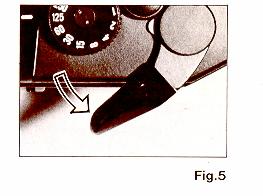
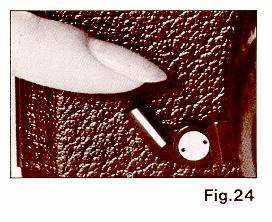
11. REWINDING THE FILM
To rewind the film after the last exposure: 1. Press the film rewind button until it is locked in the depressed state.
2. Tilt up the rewind crank and turn in the direction of the arrow.
3. When the film is completely rewound the rewind knob will suddenly turn very easily.
4. Pull the rewind knob against the resistance to open the back.
5. Take out the film.
6. Press the rewind knob down and close the back cover.

Note:
Avoid direct sunlight when unloading or loading the film. If the film advance lever stops
midway and the film rewind button will not remain in the depressed state, then rewind the
film while keeping the rewind button depressed with your finger. Never open the back
cover until the film is completely rewound.
12. The B" (Bulb) Setting
At the "B" setting, the shutter remains open while the shutter button is depressed to expose the film. Use the "B" setting to take night scene, etc. At the "B" (bulb) setting, use the tripod, cable release, etc.
13. Taking with the Self-Timer
The self-timer is used for self portraits and allowing yourself to include in the photograph when desired.
1. Push the film advance lever, and fully turn the self timer lever counterclockwise as indicated on the picture.
2. When pressing the shutter button, the self-timer is operated, and the shutter will be released approx. 10 seconds later.
If you once set the self-timer, you cannot cancel the self-timer operation. Set the self-timer only when you desire the self-timer operation. When the self-timer lever is fully turned, the shutter will be released approx. 10 seconds later.
14. Flash Photography
1. When using the flash unit, you can use the flash only by inserting the flash into the hot shoe.
2. Set the shutter speed dial at 1/125 or longer.
15. Depth-of - Field
When the camera is focused at certain distance, there are the ranges for taking the subjects clearly in the picture on both sides of the distance. This ranges are called the "depth-of-field'.'
There are following relationships in the depth of field:
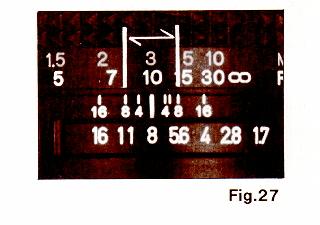
1. When the aperture is reduced (2 to 16), the depth of field is increased to increase the ranges for taking the scene clearly in the picture.2. When taking farther scene, the depth of field is increased longer.
3. Wider angle lens of short focal length provides longer depth of field.
4. The rear range from the focused distance of the camera provides longer depth of field than the front range from the distance.
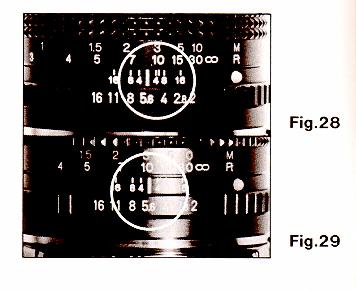
You can know the depth of field as below.
1. A depth-of-field scale is engraved on the respective lenses. When the camera is, for example
focused on a subject at the distance, e.g., 3m with the aperture set at f/8, the subjects
located within 8 at both sides of the "1" mark (approx. 2m in the front range and approx. 5m
in the rear range) are sharp and clear.
16. INFRARED RED MARK
The short red line on one side of the datum mark is the infra-red ray mark, which is used to correct the focusing when using infra-red film and filters. The infra-red ray has a longer wave length than the visible light range, therefore, the focusing is displaced being indicated by a short red line.
Infra-Red Photography
1. Attach an infra-red filter to the camera.
2.
Focus the lens using the red line.
3. Set the exposure according to the description on the film and release the shutter.
It is probable is impossible to focus the camera with the infra-red filter in position. Either focus with the filter removed and then replace it or use the distance scale.
17. CHANGING AND REMOVING THE LENS
Depress the lens release button and turn the lens counter-clockwise until it stops. The lens will now move freely from the body.
Fitting the lens Match the red point on the camera body with the red point on the lens barrel. Fit the lens to the camera and turn it clockwise
until it locks into position.
The Bayonet Mount Your COSINA CT-1A camera is equipped with a "K" type bayonet mount and will accept all lenses with this fitting.
Note:
Be sure to lock the lens completely. If the shutter is released and the lens is not locked into position an accurate exposure can not be obtained.
CARE OF THE CAMERA AND MAINTENANCE
1. Under no circumstances touch the lens with the hand, use a blower brush or lens cleaning tissues to remove dirt or grease.
2. Shock, moisture, salt, sand, etc. can cause damage to your camera. If you must take your COSINA CT-1A camera onto the beach remember that sand gets everywhere so keep the camera well wrapped up and in a clean sealed bag when not in use.
3. Avoid putting the camera anywhere when strong sunlight would cause an abnormally high temperature eg.. on the back shelf or on the seat of a parked car.
4. When storing the camera remove the battery and keep the camera in its case. Store in a dry place.
5. If the camera is to be stored for extended periods take it out periodically and operate it a few times.
6. Avoid storing the camera where abrupt temperature changes take place.