(Early Kowa)
posted 10-9-'03
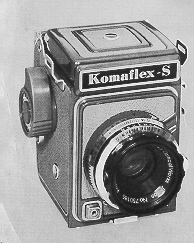
The next page contains information on this
camera.
If the image below looks like your camera,
click below to see
the PDF manual.
The next page also contains information
on how
to donate to this site.
This will help me to continue to host this site,
buy new manuals, and pay their shipping costs.
It'll make you feel better, won't it ?
If you use Pay Pal, use the link below.
Use the above address for a check, M.O. or cash.
buy new manuals, and pay their shipping costs.
It'll make you feel better, won't it ?
If you use Pay Pal, use the link below.
Use the above address for a check, M.O. or cash.
Click here for Camera Manual site
Problems opening
PDF files or printing problems
- click here
CLICK HERE TO CONTINUE
TO Komaflex-S
FULL HTML MANUAL