and historical purposes, all rights reserved.
This page is copyright© by
This page may not be sold or distributed without the
expressed permission of the producer
I have no connection with any camera company
This camera manual library is for reference
and historical
purposes, all rights reserved.
This page is copyright©
by
![]() ,
M. Butkus, NJ.
,
M. Butkus, NJ.
This page may not be sold or distributed without the
expressed
permission of the producer
I have no connection with any camera company
On-line camera manual library
If you find this manual useful,
how about a donation
of $3 to:
M. Butkus, 29 Lake Ave.,
High Bridge, NJ 08829-1701
and send your e-mail
address
so I can thank you.
Most other places would charge
you
$7.50 for a electronic copy
or $18.00 for a hard to read Xerox copy.
If you use Pay Pal, use the link below.
Use the
above address for a check, M.O. or cash.

www.PayPal.me/lynnbutkus
Venmo is @mike-butkus-camera Ph 2083
<<< IF YOU WOULD LIKE THIS OR ANY PDF FILE
PRINTED, BOUND AND MAILED TO YOU,
SEE THIS OUTSIDE COMPANY'S OFFER >>>
Back to main camera manual page
CLICK HERE
TO CONTINUE TO
MS WORD Mamiya ZE-2 Quartz Document
CLICK HERE
TO CONTINUE TO
Mamiya ZE-2 Quartz PDF
made from HTML Page
The PDF shows all the images on one page, better printing.
MAMIYA
ZE LENSES
CLICK HERE TO
CONTINUE TO
Revue AM Quartz PDF MANUAL
AKA - Mamiya ZE-2
Revue AM Quartz
Bedienungsanleitung
Revue AM Quartz Mode D'Emploi
Revue AM Quartz Gebruiksaanwijzing
Revue AM Quartz istruzioni per l'uso
 |
 |
 |
 |
 |
 |
 |
 |

 |
 |
 |
 |
 |
 |
 |
 |
 |
 |
 |
 |
 |
 |
 |
 |
 |
 |
 |
 |
 |
 |
 |
SPECIFICATIONS
Type of camera:
Picture format: 24mm x 36mm.
Shutter:
Electronically
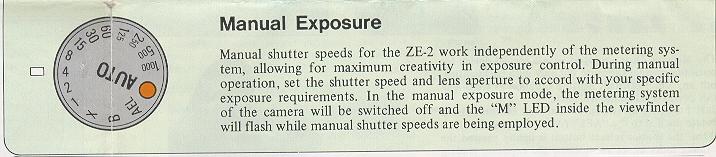
controlled metal focal plane. Speed range from 1 sec. to 1/1000 sec. at AUTO position;
Manual speed from 1 sec. to 1/1000 sec. in one stop increment with click stop at
each nominal position, plus mechanical speeds of X (1/90 sec.) and B.
Self-timer:
Sync contact:
Metering
system:
Metering range:
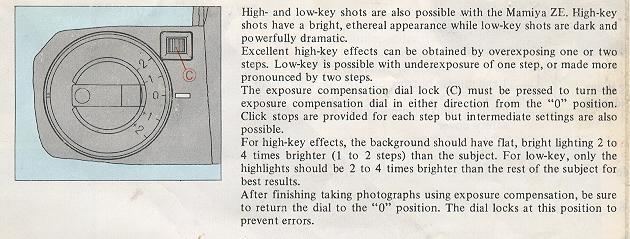
Exposure compensation:
Film speed range:
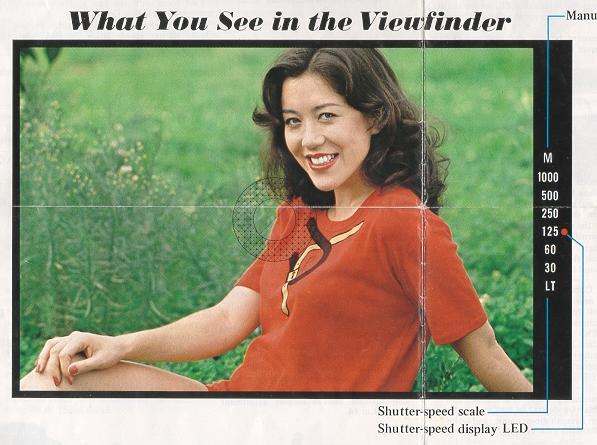
Viewfinder information display:
Viewfinder magnification ratio:
Focusing screen:
Film advance:
Exposure counter:
Film rewind:
Power source:
Power switch:
Flash synchronization:
Winder coupling:
Dimensions:
Weight:
Specifications and design are subject to change without notice.
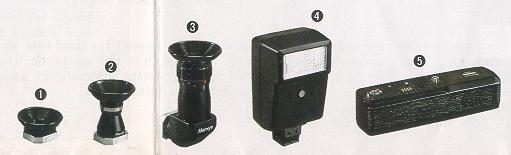
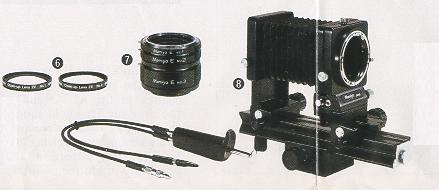
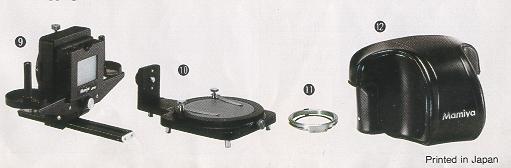
ACCESSORIES FOR YOUR ZE-2
Filters
Diopter Correction Lenses ZE
This info was provided by a reader:
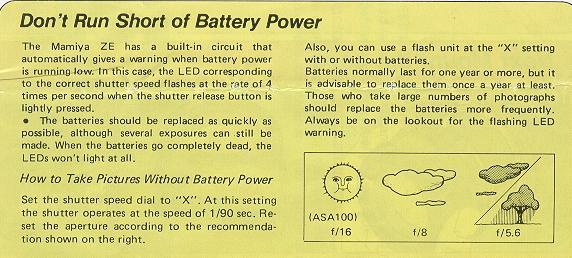
DON'T RUN SHORT ON BATTERIES
How to Take Pictures Without Battery Power
Set the shutter speed dial to "X". At this setting the shutter operates
at the speed of 1/90 sec. Reset the aperture according to the recommendation shown
on the right.
Also, you can use a flash unit at the "X" settings, with or
without batteries.
Batteries normally last for one year or more, but it
is advisable to replace them once a year at least. Those who take large numbers
of photographs should replace the batteries more frequently. Always be on the lookout
for the flashing LED warning,
GETTING THE MOST FROM YOUR BATTERIES
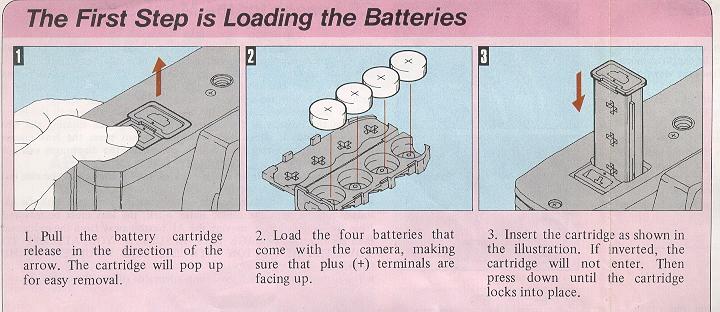
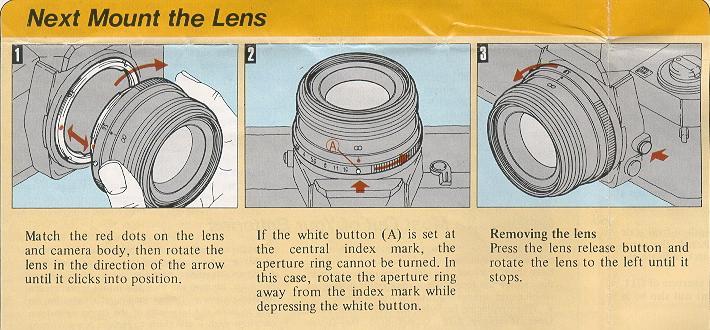
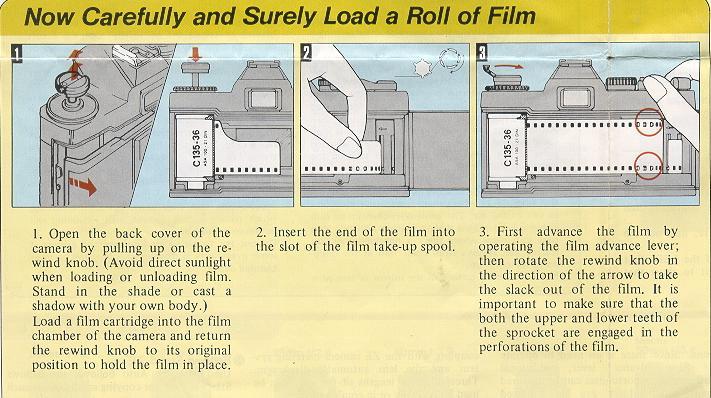
| Load the batteries | Mount the lens | Load the film | Set film speed |
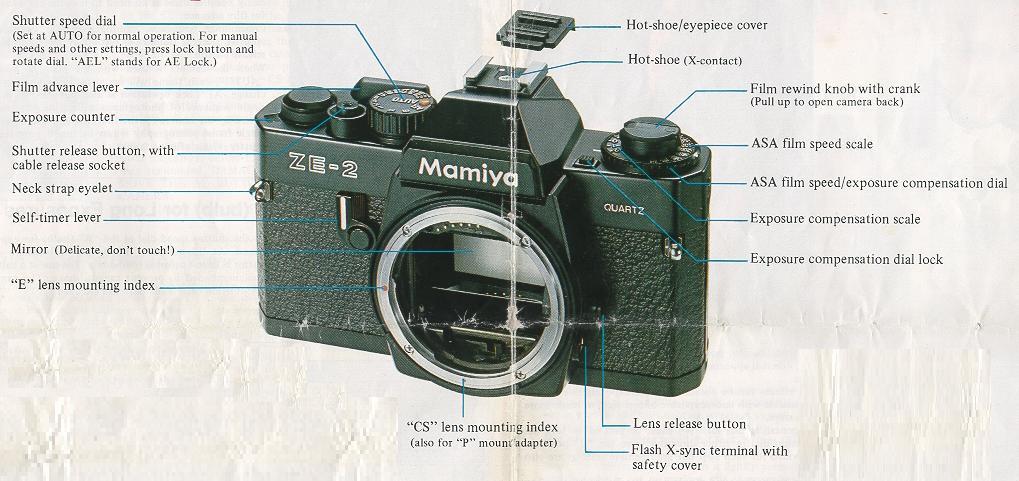
| ZE-2 front body parts | ZE-2 lens parts | ZE-2 rear body parts | Viewfinder |
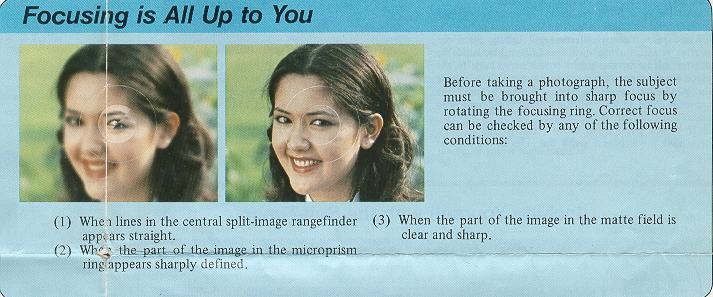
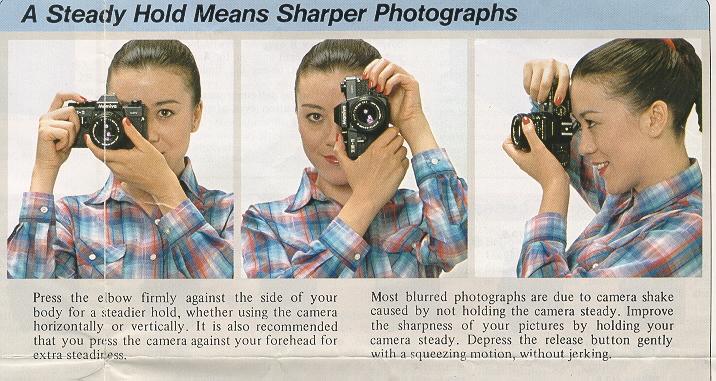
| Auto Exposure | Manual Exposure | Focusing | Holding the camera |
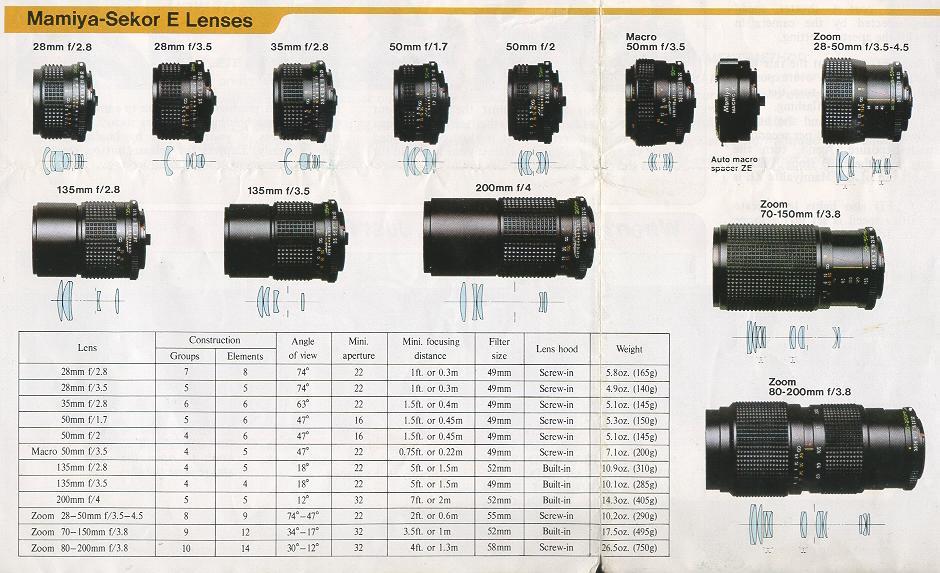
| Battery Power | Handling Cautions | Mamiya-Sekor E Lenses |
| Getting the most from your batteries |