Mamiya ZE-X

This camera manual library is for reference
and historical purposes, all rights reserved.
This page is copyright© by Butkus Camera Manual Site, M. Butkus, NJ.
This page may not be sold or distributed without
the expressed permission of the producer

I have no connection with any camera company

On-line camera manual library

<<< IF YOU WOULD LIKE THIS OR ANY PDF FILE
PRINTED, BOUND AND MAILED TO YOU,
SEE THIS OUTSIDE COMPANY'S OFFER >>>


Back to main on-line manual page

If you find this manual useful,
how about a donation of $3 to:


M. Butkus, 29 Lake Ave.,
High Bridge, NJ 08829-1701
and send your e-mail address
so I can thank you. 
Most other places would charge
you $7.50 for a electronic copy
or $18.00 for a hard to read Xerox copy.

This will help me to continue to host this site,
buy new manuals, and pay their shipping costs.

It'll make you feel better, won't it ?


 If you use Pay Pal, use the link below.
Use the above address for a check, M.O. or cash.

butkus camera manual site

www.PayPal.me/lynnbutkus
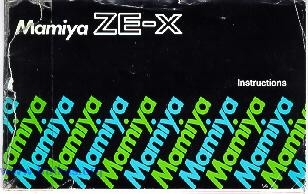

Venmo is @mike-butkus-camera  Ph 2083


CLICK HERE TO CONTINUE TO
 MS WORD Style Document


CLICK HERE TO CONTINUE TO
 PDF made from HTML Page


Mamiya ZE-X camera
(posted 3-26-02)

Additional info I received 10-'05
In an added note, I have found that the "ZE" P adapter designed for use with the ZE and ZE-2 Mamiya cameras will not work on the Mamiya ZE-X camera. Most references for the "ZE" P adapter give the perception that it can be used on all ZE series cameras. This is not the case for the ZE-X. If you attempt to use the "ZE" P adapter on the ZE-X camera the adapter will stop cold at the gold dedicated EF camera/lens contacts of the ZE-X and if you force the installation of the "ZE" P adapter onto the ZE-X it will damage those gold contact pins.

I have not seen a reference to this effect in any description of the ZE-X. Furthermore, I have seen no references for the Mamiya ZM camera allowing adapters that permit the use of lenses from the DSX, MSX, DTL and TL series of cameras. The ZM does allow 645 series lenses to be used on "ZE" and "ZE-2" cameras utilizing their "645 adapter ZE". I have however installed the Mamiya "ZE" P adapter to an Auto Mamiya-Sekor 1:1.8 f=55mm M42 mount lens with it's f-stop aperture switch set in manual mode on the Mamiya ZM in auto shutter mode with good operational results.

Even more info on the adaptor - 
One way to use the Mamiya ZE "P" adapter with the Mamiya ZE-X without damaging the ZE-X is to first attach an Osawa MC-4 ZE 2x teleconverter to the ZE-X camera body. Then you can attach the ZE "P" adapter to the teleconverter in order to use lenses from the DSX, MSX, DTL and TL series of cameras. Of course you will have then doubled your focal length by two but at least you have the ability to use those M42 lenses with the ZE-X.


Welcome to the Wonderful World of Mamiya Crossover Photography

Congratulation on your choice of a Mamiya ZE-X Crossover single lens reflex camera. This highly versatile multimode automatic exposure (AK) camera not only offers you shutter speed priority AK, aperture priority AK, programmed AK, and electronic flash AE (with Mamiyalite MZ flash units), but is also equipped for crossover between all four modes. A full manual override is provided for advanced amateur and professional photographers.

The Mamiya ZE-X is simplicity itself to use. Whichever AE mode, shutter speed, or aperture you select, the Crossover capability guarantees perfectly exposed, camera shake free pictures under all but the very darkest conditions. And even with, extremely dark subjects, if you attach a Mamiya dedicated flash to your camera, you can be sure of beautifully exposed pictures every time.

This manual is designed to help you get the best out of your Mamiya ZE-X.  Please read it carefully and completely familiarize yourself with the remarkable features of this super camera. And, to make photography with your ZE-X even more" convenient, please note that a full range of systems accessories is available, including an automatic film winder, a complete range of interchangeable lenses, electronic" flash units, close-up accessories and many, many others. Build up your systems as your skills and requirements grow!

Features of the Crossover System
and the AE Modes 3

Basic Operation Steps 

Description of Parts 

Standard Camera Operation

Loading the Batteries 

Lens Mounting/Removal 

Loading the Film

Setting the ASA Film Speed 

Selecting the AE Mode 

(A) Shutter Speed Priority Crossover AE 

(B) Aperture Priority Crossover AE 

(C) Programmed AE 

Focusing 

Holding the Camera 

Rewinding the Film 

ZE-X's Electronic Mechanism 

Viewfinder Display 

Features of the Crossover System 

Camera Shake Prevention

Shutter Speed Priority Crossover AE Variation 

Aperture Priority Crossover AE Variation 

Programmed AE Variation

Flash Photography 

(A) Flash AE Crossover with EF Lenses 

(B) Flash AE Crossover with E Lenses 

(C) Flash Photography with Mamiyalite ZE 

Additional Features : 

Exposure Compensation

(A) Exposure Variation Dial 

(B) Exposure Memory Button 

Manual Exposures

B (Bulb) for Long Exposures 

Self-Timer 

Eyepiece Blind 

Multiple Exposures 

Depth-of-Field Control 

Infrared Photography 

Mamiya Sekor EF/E Lenses

Accessories 

Precautions on Batteries 

Handling Cautions 

Specifications 


Features of the Crossover System and the AE (Auto Exposure) Mode

The Crossover System
The ZE-X Crossover System enables the camera to cross over automatically between the various AE modes in the following circumstances:

1) Used with the shutter speed priority AE or aperture priority AE modes, it allows the camera to automatically correct exposure settings in unforeseen situations when conditions are such that your pre-selected shutter speed or aperture will not give you a correct exposure.

2) With the two modes mentioned above and in the programmed AE mode, it allows the camera to open the aperture automatically and maintain a safe shutter speed, that is, a speed which is above the "camera shake" limit for the lens in use. This ensures blur-free hand-held photography in all but the most extreme exposure conditions.

3) When the Mamiyalite MZ 36R and MZ 18R dedicated auto electronic flash units are used with the camera, the Crossover System acts to prevent the flash discharging in exposure situations where correct exposure can be obtained without flash, but automatically switches the camera back to the flash AE mode if the shutter speed drops below the handheld "camera shake" limit.

Shutter Speed Priority AE
In this mode, the camera sets the correct aperture for you, leaving you free to control the shutter speed. This type of auto exposure is especially useful when you wish to deliberately blur your subject or the background by using a slow shutter speed, or when you need to use a fast shutter speed to freeze the action. If you are a beginner without much knowledge of photography, we suggest that you set the shutter speed to 1/125 second until you get the feel of it; with the Crossover switch on, there will be no need to change shutter speeds for different lighting conditions.

Aperture Priority AE
Use of this mode allows you to select any aperture freer while the camera automatically matches it with the appropriate shutter speed. This permits you to take full advantage of the different focusing characteristics of the lens in us to create different effects with your pictures. Large apertures for example, can be used to highlight your subject again an out-of-focus background, while small apertures will give greater overall sharpness to the entire photo.

Programmed AE (Total Auto)
With this mode, the camera's microprocessor selects both the shutter speed and the aperture according to the prevailing light conditions. Since the camera sets up the exposure for you entirely, this mode is highly suitable for candid photography and snapshots where there is no time or it is too much trouble for you to set the exposure controls yourself. Naturally, it is also ideal for beginners, since there is little danger of exposure failure. In fact, we recommend that you keep the camera in this mode while carrying it, so that you will always be ready for those once-in-a-life time shots. This will also give you the option of switching directly to the shutter speed or aperture Priority AE modes as needed.

Electronic Flash AE
When used in combination with the dedicated Mamiyalite MZ flash units, the ZE-X will automatically set the aperture and synchronize for flash on charging, thereby making auto flash exposures as easy as normal auto exposures. In addition, the Crossover System makes flash override possible in all of the AE modes.


Basic operations steps

1. Load the batteries.  Make sure polarity is correct!
Mamiya ZE-X camera


2. Load the film and advance to the first frame.


Mamiya ZE-X camera
Mamiya ZE-X camera


3. Set the ASA film speed.  

Mamiya ZE-X camera Mamiya ZE-X camera

Make sure the crossover switch (A) is at its normal position (flush with the camera body).

4. Select the AE mode.  (See previous pane for general description).

A) Shutter Speed Priority AE.

Mamiya ZE-X camera

B) Aperture Priority AE.

Mamiya ZE-X camera

C) Programmed AE.

Mamiya ZE-X camera

·Before settee the dial away from the "A" setting, press the lock-release button (B) and turn simultaneously.
·To lock and unlock aperture ring, press the white button and simultaneously rotate.

Mamiya ZE-X camera

5. Viewfinder Check.

Mamiya ZE-X camera

Press shutter button partway. Depending upon AE mode in use, shutter speed and aperture or "P" will appear in the viewfinder.

Compose the picture and focus. Press shutter button gently to take photo. (Page 19)

Rewind the film when all frames are exposed. (Page 21)


Description of Parts

Mamiya ZE-X camera
Mamiya ZE-X camera


Mamiya ZE-X camera


Loading the Batteries

1. Press the battery chamber cover in the direction of the arrow until it swings open.

Mamiya ZE-X camera Mamiya ZE-X camera


2. Before inserting the batteries, wipe both sides with a dry cloth to ensure that contacts are clean. Place both batteries into the battery chamber as shown, making sure the (+) (-) polarity markings match those on the chamber cover.

Your ZE-X will not function if batteries are improperly inserted or batteries are not loaded.

Battery Check/Low Battery Warning
After loading the batteries, press the shutter button partway to see if the data display inside the viewfinder lights. If the display fails to light, batteries may be depleted or improperly inserted.

Low Battery Warning: 
When the entire I display begins to flicker at a fast rate (8 flashes per second) batteries are low and should be replaced promptly to ensure uninterrupted operation. The slow pulsation of the displays warns you of over and underexposures.

Lens Mounting/Removal

Mamiya ZE-X camera Mamiya ZE-X camera

Match the red dots on the lens and Press the lens release button and turn camera body, seat the lens in the mount lens counterclockwise until it stops. and turn clockwise until lens locks in Unseat lens from mount. place with a click.

Note on White Button: The white button serves as an auto aperture lock for shutter speed priority AE and programmed AE operation with both E and EF lenses. To lock the ring at the index mark, press the button and simultaneously rotate until it locks in place. To unlock the ring press button and rotate to desired aperture setting.

Caution: When not mounted, always cover both ends of lenses with lens caps to protect from dust and scratches. Do not put lens down on its uncovered mount. Wipe electrical contacts gently with clean cloth periodically to maintain proper contact.


Loading the Film

Mamiya ZE-X camera Mamiya ZE-X camera Mamiya ZE-X camera

1. Open the back cover of the camera by pulling up on the rewind knob. (Avoid direct sunlight when loading or unloading film.) Load the film cartridge into the film chamber of the camera and reset the rewind knob to its original position.

2. Insert the end of the film into the slot of the film take-up spool.

3. First advance the film by operating the film advance lever; then rotate the film rewind knob in the direction of the arrow to take up film slack. Make sure that both the upper and lower teeth of the sprocket are engaged in the perforations of the film.

· To avoid unnecessary delays when loading the film, set the shutter speed dial to one of the faster manual settings, e.g., 1/1000 sec. If you load the film with the dial set at "A", remove the lens cap and point the camera toward a bright light source to prevent long exposures.

· As a reminder of the type and number of exposures of the film loaded in the camera, tear off the end of the film box and insert it in the memo holder on the back cover.

Setting the ASA Film Speed

Mamiya ZE-X camera Mamiya ZE-X camera Mamiya ZE-X camera

4. Close the back cover of the camera and advance the film by alternately operating the film advance lever and releasing the shutter until the numeral "1" appears in the exposure counter. While performing this operation, make sure that the film is advancing properly by checking if the rewind knob rotates when the film advance lever is Operated.

Set the ASA film speed of the film being used by lifting up the outer rim of the film speed dial and rotating the dial until the index indicates the correct ASA value on the film speed scale (the film speed is noted on the film cartridge or box). Intermediate film speeds can be set as follows when necessary.

After setting the ASA film speed, check to make sure that the exposure variation dial is set to "0" before shooting.

Selecting the AE Mode

Shutter Speed Priority Crossover AE - With this exposure mode, you set the shutter speed and the camera selects the correct aperture for you.

Mamiya ZE-X camera Mamiya ZE-X camera Mamiya ZE-X camera

1. Set the crossover switch (A) at its normal position (flush against the camera body).

2. Press the white button on the lens aperture ring and rotate the ring until it locks at the index mark.

3. Select the shutter speed desired according to the type of subject you are photographing and the effect you wish to create. CAUTION: If the dial is locked at "A" beforehand, press the lock release button (B) and turn. Do not force the dial.

· The shutter will not operate at the B (Bulb) setting in the shutter priority mode.

4. Press the shutter button partway and look into the viewfinder. The aperture selected by the camera to give proper exposure appears in the viewfinder

Mamiya ZE-X camera


· For exposures requiring a shutter speed slower than 1/30 sec., mount the camera on a sturdy tripod or switch to flash photography to prevent camera shake.

· For lenses with a maximum aperture of f/1.7, the viewfinder displays either "1.4" or "2.0" as the maximum aperture setting; for those with a maximum aperture of f/3.5, the maximum aperture setting in the viewfinder is either "2.8" or"4.0".

Shutter Priority AE without Crossover
When you desire the camera not to alter the shutter speed you initially set for certain purpose, disengage the crossover system by sliding the crossover switch (A) out over the camera body. If the setting in use is not proper, the minimum aperture of the lens in use will flash to indicate overexposure; the maximum aperture will flash for underexposure. When proper exposure is desired, turn the shutter speed dial until the flashing ceases.


Mamiya ZE-X camera Mamiya ZE-X camera


Selecting the AE Mode
Aperture Priority Crossover AE - With this exposure mode, you set the shutter speed and the camera selects the correct aperture for you.

Mamiya ZE-X camera Mamiya ZE-X camera Mamiya ZE-X camera

1. Set the crossover switch (A) at its normal position (flush with camera body).

2. Set the shutter speed dial at "A" (dial locks at "A" to prevent accidental movement).

3. Set the aperture on the lens aperture ring in accordance with the effects desired or lighting conditions of the subject.

NOTE: If the aperture ring is locked at the white button (C), press the button and simultaneously rotate the ring to your desired aperture setting.

Mamiya ZE-X camera

4. Press the shutter button partway, then your preselected aperture and the shutter speed selected by the camera for the proper exposure will appear in the viewfinder.

·For lenses with a maximum aperture of F1.7, the viewfinder displays either "1.4" or "2.0" as the maximum aperture setting; for those with a maximum aperture of f/3.5, the maximum aperture setting in the viewfinder is either "2.8" or "4.0".

·Always use a tripod for slow shutter speed to prevent picture blur.

Mamiya ZE-X camera Mamiya ZE-X camera


When you desire the camera not to alter the aperture you initially set for certain purpose, disengage the crossover system by sliding the crossover switch (A) out over the camera body. If the setting in use is not proper, the fastest shutter speed (1000) indication will flash to indicate overexposure. The slowest speed (16 ) will flash for underexposure. When proper exposure is desired, turn the aperture ring until the flashing ceases.

Selecting the AE Mode
C. Programmed AE - With this mode, the camera sets both the shutter speed and aperture accordance with lighting conditions.

Mamiya ZE-X camera Mamiya ZE-X camera Mamiya ZE-X camera


1. Set the shutter speed dial at the ·"A" setting. :'

2. Press the white button and lock the aperture ring by rotating the ring until the button locks at the index mark.

3. Press the shutter button partway. "P" appears in the viewfinder to indicate proper exposure at a hand-holdable fast shutter speed selected by the camera.

* Slow Shutter Speed Warning
Mamiya ZE-X camera

Often when you are shooting in poor lighting conditions and selected shutter speed is too slow for hand-held shooting, the speed indication will appear alongside the "P" to warn you. When slow shutter speed warning is given, mount the camera on a tripod or hold the camera steady on a firm support.
The slow speed warning varies by the focal length of the lens in use. With a 50mm lens, the warning appears when shutter speeds drop below 1/30 sec.

·With programmed AK, the position of the crossover switch has no effect on exposures except for flash photography.

* Over/Underexposure Warning
Mamiya ZE-X camera

When the scene is too bright for the proper exposure, the fastest shutter speed indication (1000) appears in the viewfinder and flashes. If the scene is too dark for the proper exposure, the slowest shutter speed indication (16) appears in the viewfinder and flashes.

Focusing
Focus sharply on the subject by rotating the focusing ring of the lens. Correct focus can be checked as follows;
Using the Split-lmage Rangefinder: Turn the focusing ring until the split images in the central spot appears straight. Using the Microprism Collar: Turn the focusing ring until the image in the microprism collar appears sharply defined.


Mamiya ZE-X camera Mamiya ZE-X camera

Using the Matte Field: Turn the focusing ring until the image in the matte field clear and sharp.

Holding the camera
Press the elbow firmly against the side of your body for a steadier hold, whether using the camera horizontally or vertically. It is also recommended that you press the camera against your forehead for extra steadiness.

Mamiya ZE-X camera Mamiya ZE-X camera

Most blurred photographs are due to camera shake caused by not holding the camera steady. Improve the sharpness of your pictures by holding your camera steady. Depress the release button gently with a squeezing motion, without jerking.

Rewinding the film
After the last exposure, the film must be rewound completely into its cartridge before opening the back cover.

Mamiya ZE-X camera Mamiya ZE-X camera Mamiya ZE-X camera


1. Press the film rewind release button.

2. Fold out the film rewind crank and rotate the knob in the direction of the arrow until resistance ceases and the knob turns freely.

3. Open the back cover by pulling up on the rewind knob and remove the film.

Electronic Mechanism ZE-X

* Viewfinder Display

Mamiya ZE-X camera Your ZE-X features a bright, full-frame viewfinder which gives all the necessary exposure information for the exposure mode in use via an easy to-read LED digital display system. The brightness of the LED read-out is automatically regulated to match the brightness of the subject. The viewing of the LED read-out therefore, is always comfortable under any circumstances.


For lenses with a maximum aperture of f/1.7, the viewfinder displays either "1.4" or "2.0" as the maximum aperture setting, for those with a maximum aperture of f/3.5, the maximum aperture setting in the viewfinder is either "2.8" or "4.0"

Mamiya ZE-X camera


Mamiya ZE-X camera
Programmed AE mode


Crossover system in effect

manual exposure operation

Exposure variation in effect (warns dial is no t set at "0")

Flash ready indication for Mamiya dedicated flash units. 

Indicates maximum flash distance in meters with E lenses (and EF lenses with focusing distance priority switch OFF)


·Features of the Crossover System

The ZE-X's Crossover System permits automatic "crossover" between the various AE modes to assure exposure-perfect photos at all times.

1. Used with the shutter speed priority or aperture priority AE modes, the Crossover System automatically comes into effect to correct exposure settings, when your preselected shutter speed or aperture will not give you correct exposure, thus enabling you to obtain the best exposure possible under the prevailing lighting conditions.

2. With hand-held photography in both the shutter speed priority and aperture priority AE modes, and at all times with the programmed AE mode, the ZE-Xis designed to maintain a shutter speed which is safe, i.e., above the "camera shake" limit for the lens in use. So long as exposure conditions permit, you are sure of blurfree photographs.

3. If a Mamiyalite MZ 36R or MZ 18R auto electronic flash in) is used with this camera, it will not operate unless the shutter speed in any AE mode drops below the "camera shake" limit.


· "Camera Shake" Prevention


It is the rule of thumb among professional photographers that the slowest shutter speed at which sharp pictures can be taken with a hand-held camera is the speed closest to the reciprocal of the focal length of the lens in use counted in seconds. Below this speed, "camera shake" is likely to occur blurring the photograph. The ZE-X is designed to operate within the following "camera shake" limits depending on the focal length of the lenses as follows.

Mamiya ZE-X camera

In the programmed AE mode, "60" will appear in the viewfinder as the "camera shake" warning for 1/80 sec., while "250" warns you that the speed has actually dropped below 1/200 second.


(A) Shutter Speed Priority Crossover AE Variation

This chart shows the pattern used by the camera's microprocessor to maintain the selected shutter speed for as long as possible in relation to the lens aperture and the lighting conditions.

When shooting bright scenes at 1/125 sec., for example, the camera maintains the preset shutter speed until the minimum aperture (f/16) is reached, then shifts to a faster shutter speed. For dark scenes, it holds the set shutter speed until the lens opens to maximum aperture, and then shifts to a slower one to ensure a proper exposure.

The Crossover System also corrects any mistakes you might make in setting the shutter speed. If the shutter speed is set at 1/15 sec., which is too slow for a 50mm lens, the Crossover System automatically alters the speed to 1/30 sec., the "camera shake" limit for a 50mm lens, and maintains the exposure pattern indicated by the thin broken line.

Mamiya ZE-X camera


(B) Aperture Priority Crossover AE Variation

This chart shows the pattern used by the camera's microprocessor to maintain the selected aperture for as long as possible in relation to the shutter speed, the lighting conditions and the "camera shake" limit of the lens in use.

When shooting bright scenes with the 50mm lens at f/8, for example, the camera maintains the preset aperture until the fastest shutter speed of 1/1000 sec. is reached, and then varies to ensure proper exposure as shown. For dark scenes it holds to f/8 until the shutter speed reaches 1 i30 sec. (the "camera shake" limit for a 50mm lens). At this point, it varies the aperture to stay above the "camera shake" limit until the maximum aperture is reached, then shifts the shutter speed to the next slowest speed in order to assure a proper exposure. (For exposures slower than 1/30 sec., a tripod is required to prevent picture blur).

The broken line indicates the exposure pattern in the aperture priority AE mode without Crossover.

Mamiya ZE-X camera


(C) Programmed AE Variation

This chart shows the aperture and shutter speed combinations automatically chosen by the camera in the programmed AE mode.

With bright scenes, the program automatically select a combination of a fast shutter speed and a small aperture, while for dark scenes, it automatically keeps the shutter speed above the "camera shake" limit of the lens in use (1/30 sec. with 50mm lens) until the maximum aperture is reached. -At that point, the shutter speed again shifts to the next slowest speed to ensure a proper exposure.


Mamiya ZE-X camera


Flash Photography ZE-X


Flash Photography

Flash units are indispensable system accessories.
When using the Mamiyalight MZ auto electronic flash with the ZE-X, the camera automatically controls the aperture according to the ASA film speed which you set when loading the film in the cameral and synchronizes the shutter at 1/60 sec. on charging. Moreover, when an EF Series lens is used, the revolutionary Distance Priority Flash AE system automatically selects the aperture according to the focusing distance. This eliminates all your worries about correct exposures and does away with troublesome exposure setting.

Crossover Performance

When the Crossover System is on, the flash will not discharge unless it is necessary and the regular crossover AE mode takes priority. The flash will operate only when the shutter speed in any AE mode drops below the "camera shake" limit and the flash has been recharged. If, in a bright situation, you wish to use flash for daylight synchronization or any other purpose, either disengage the Crossover System or switch to the manual mode.

Selecting the Base Mode for Flash

The following instructions for Flash AE Crossover operations are divided into two main sections: (A) Flash AE with EF Lenses and (B) Flash AE with E Lenses. With both types of lenses, all three regular AE modes may be used for flash AE photography. With EF lenses, however, the aperture priority AE mode is preferable to the others since it saves flash energy. While basic operating methods are explained here using the Mamiyalite MZ 36R as an example, procedures for the MZ 18R are similar. For detailed operating instructions, refer to the instructions accompanying the flash unit.


(A) Flash AE Crossover with EF Lenses

Procedures in the aperture priority AE mode:

1. Attach the flash unit to the camera and the crossover switch to its normal position (flush with camera).

Mamiya ZE-X camera Mamiya ZE-X camera

2. Set the aperture ring to the desired aperture setting, f/4 for instance.

3. Set the shutter speed dial to "A".

Mamiya ZE-X camera Mamiya ZE-X camera

4. Set the focusing distance priority switch at the base of the EF lens to ON by clicking it as far as it will go in the direction of the arrow.

5. Turn the flash unit power switch on and set the selector at MZ-A. Press the shutter button partway and the indication EF appears in the viewfinder, take your picture. The shutter is set automatically at 1/60 sec. and the flash exposure is controlled according to the distance to the subject.

Note:
The focusing distance priority switch is ON when positioned next to the serial number and OFF when positioned at the opposite side where an orange mark appears in the groove. For the general flash photography, keep the switch ON. For bounce flash photography with the Mamiyalite MZ 36R flash unit, for example, make sure the switch is OFF. This way the flash is operated on the reflected back light from the subject instead of the subject distance.


Automatic Aperture Variation in relation to flash distance with EF lenses

·In the aperture priority AE/manual operation modes 
(At ASA 100, with 50mm f/1.4 EF lens and Mamiyalite MZ 36R):

Mamiya ZE-X camera

(A) For auto flash photography up to 9m, f/4 is the ideal aperture since the intencity of the flash is controlled according to the focused distance and surplus energy is saved for the next shot.

(B) Beyond 9m at f/4, the Crossover System automatically opens the aperture to obtain the required additional exposure. 

(C) At small apertures. recharging takes longer because greater flash intencity is required when the lens is stopped down.


(1) Normal Flash Exposure: When you press the shutter button partway after the flash unit has recharged, the EF mark and the aperture value you have chosen will be indicated in the viewfinder.

(2) Crossover Flash Exposure: When your subject is too far away for a proper exposure at the aperture setting you have chosen, the Crossover System will automatically correct the aperture for you. The " o " crossover symbol appears at the right of the aperture value indicated in the viewfinder to inform you that a cross over flash exposure is being made.

(3) Underexposure: If your subject is too far away for a proper exposure even at the maximum aperture of the lens in use, the maximum aperture indication will flash in the viewfinder to inform you that your subject is out of flash exposure range.

·When you set the crossover switch to FIX by sliding it forward, the Crossover System is disengaged and flash exposures will always be made at the aperture you have chosen.

·When the subject is too far away for a proper exposure, however, the aperture setting will flash in the viewfinder as a warning. To obtain a proper exposure, open the aperture ring manually until the flashing ceases.

·In the programmed AE/shutter speed priority AE modes
(at ASA 100, with 50mm F/1.4 EF lens and Mamiyaite MZ 36R)

Mamiya ZE-X camera

In the programmed AE or shutter speed priority AE modes, the aperture changes automatically in relation to the focusing distance. Up to 12.5 meters, flash energy remains at one half of full (GN 18); beyond 12.5 meters, flash intensity automatically increases to full (GN 36).

"Out of Auto Flash Range" Warning When the focusing distance is less than 1.1m, "16" will flash in the viewfinder to indicate that the subject is too close for flash; beyond 26m, "1.4" will flash to indicate that the subject is beyond the maximum flash range.

Automatic Flash Synch Setting

In the shutter speed priority AE and manual modes:

1. The shutter speed is automatically set at a flash synch speed of 1/60 sec. after the flash unit has recharged, even if the dial has been set for a faster shutter speed.

2. When the preselected shutter speed is slower than 1/60 sec., the exposure will be made at the speed in use. Use of slower shutter speeds is useful for long exposures where additional exposure of the background is desired.


(B) Flash AE Crossover with E Lenses
The EF lens performs in the same way as the E lens whenever you set the focusing distance priority switch of the EF lens to OFF.

Mamiya ZE-X camera Procedures in the programmed AE/shutter speed priority AE modes: 
1. Switch the flash unit on and press the shutter button partway. The camera will automatically set the lens aperture according to the film speed (f/8 at ASA 100, f/16at ASA 400), and the maximum auto flash range for the aperture is indicated in meters in the viewfinder after the flash has charged.

2. When the indicated distance is not sufficient to cover your subject, open the aperture until the distance indication is adequate to cover your subject.

Procedures in the aperture priority AE/manual mode: 
1. Set the aperture ring at the desired aperture, for example f/4.
2. Switch the flash unit ON and press the shutter button partway. When the flash has charged, "EF" will appear in the viewfinder and the maximum auto flash range for the aperture in use will be indicated in meters.
3. When your subject is beyond the auto flash range indicated for the aperture in use, open the aperture ring to a wider aperture until your subject is within the indicated range. At maximum aperture, the distance indication given is the maximum auto flash range for the lens in use.


Automatic Flash Synch Speed Setting
In the shutter speed priority AE and manual operation mode:


1. The shutter speed is automatically set at a flash synch speed of 1/60 sec. after the flash unit has charged, even though the dial is set for faster shutter speeds. 
2. When the preselected shutter speed is slower than 1/60 sec., the exposure will be made at the speed in use. Use of slower shutter speeds is useful for long exposures where additional exposure of the background is desired.

Keys to better flash photography

· If you release the shutter before the flash has charged, a non-flash exposure will be made at the exposure setting of the preselected mode.

· Faster recharging is possible if you place your subject somewhat closer to you than the maximum distance indicated, since the camera computes the light reflected from the subject so that the flash discharges only the amount of energy that is required, saving the left-over energy for the next flash.

· The distance indications given in the viewfinder are based on the lens aperture scale and should be taken as approximate only.

· Exposure compensation can be employed for flash by setting the exposure variation dial to the appropriate plus or minus setting.


(C) Flash Photography with Mamiyalite ZE

Mamiya ZE-X camera

The Mamiyalite ZE differs from the Mamiyalite MZ, and the following operational differences should be noted to ensure correct operation.

1. Only one of the two apertures indicated by the aperture scale on the back of the unit should be used to make proper flash exposures.

2. Except for the "EF" flash ready indication, other viewfinder data is inaccurate and should be disregarded.

3. The Crossover System does not function and the crossover switch should be set to FIX.

4. With EF lenses, the focusing distance priority switch must also be set to OFF.


Precautions when using other flash units
Mamiya Camera will not be responsible for any damage caused to the camera by flash units other than Mamiya products. The electrical contacts and input/output of non-Mamiya dedicated flash units, including high voltage trigger outputs, may cause severe damage to your Mamiya camera.


Additional Features

  Exposure compensation

Mamiya ZE-X camera The center-weighted exposure metering system of the ZE-X will give you the best possible exposures with each of the camera's AE modes in most of all shooting situations. However, when the subject is situated against a bright light source such as snow, against a window in the shade of a backlit tree, or when the subject is spotlighted on stage against a dark background, some exposure increase or decrease may be required to bring out the details of the subject. The exposure compensation may be accomplished by either of two methods-the exposure variation dial or exposure memory button.


For exposures where exposure variation is being employed, a "V" appears in the viewfinder to inform you that compensation is in effect for the shot at hand. Be sure to set the dial back to "O" when exposure variation is not longer needed to avoid exposure failures.

Use of the exposure variation dial is the most effective method of exposure compensation when you cannot approach your subject closely, such as a person standing against the snow across the river or spotlighted on stage, etc.
The dial surrounds the film rewind knob permits up to +3EV (3 f/stops) variation. The dial normally locks at the "O" setting for standard exposures. When compensation is required it may be set for exposure increase at +1 +2 +3 or exposure decrease at -1 -2 -3 by pressing the lock button (D) and rotating to the desired setting. In-between settings may also be used. The amount of increase or decrease required depends mainly on experience; in the beginning, its a good idea to take same photo at two or three settings to be on the safe side.

Exposure increase (for backlit subject):
When the subject is situated against a bright background, exposure must be increased to compensate. Press the dial lock release button (D) and set the dial to +1 or +2 as required (in extreme cases, the +3 setting may also be used). 

Exposure decrease (for frontlit subjects):
When your subject is spotlighted against a dark background such as on stage, best results are obtained by decreasing the exposure. Press the dial lock release button (D) and set the dial to the appropriate -1 or-2 setting (in extreme cases -3 may also be used).

Exposure Compensation with dedicated flash units:
In addition to the standard AE modes, exposure compensation may also be employed for flash photography with the Mamiyalite MZ 36R and MZ 18R dedicated flash units.

Mamiya ZE-X camera

Besides the exposure variation dial, there's also another method of insuring compensate exposures with the exposure memory button. This method permits you to make a direct light reading without guesswork. The exposure memory button may be used to compensate exposures with any AE mode.

Direct reading of the subject:
Walk up directly to your subject and make an exposure reading of the subject or part of the subject you wish to emphasize by pressing the shutter button partway. Next, without leaving go of the shutter button, press the exposure memory button to lock the exposure reading on your subject. Keeping the shutter button depressed partway (you may leave go of She exposure memory button) walk back to the spot where you wish to take the photo, focus and press the shutter button the rest of the way to take the photo.


Manual Exposures

The manual exposure mode of the ZE-X permits free selection of both aperture and shutter speed to give you full command of the camera when required for special effects and creative photography. Manual exposures with the ZE-X are non-metered. Set both the aperture ring and shutter speed dial to the desired aperture and shutter speed settings. Make sure the exposure variation dial is set to "O" (this doesn't function for manual operation).


While the camera controls are set for manual, an "M" will appear inside the viewfinder to inform you; no other indications are given.

Mamiya ZE-X camera

When the shutter speed dial is set at "B" the shutter will remain open as long as the shutter button is depressed. The aperture must be set manually. An "M" will appear in the viewfinder when you press the shutter button partway.

B (Bulb) for Long Exposures

Mamiya ZE-X camera Mamiya ZE-X camera

· The use of an optional cable release adapter, lockable cable release and sturdy tripod are recommended to prevent camera shake.
· Also, since long exposures present a real drain on the batteries, we recommend to use fairly new batteries.
· The self-timer doesn't operate for "B" setting.
· If the aperture ring is set at the white button (auto) with the shutter dial set at "B" the shutter does not release; the "M" indication flashes in the viewfinder to warn you to reset the aperture.

Mamiya ZE-X camera

When you wish to take family or group photos or snapshots of places you have been and include yourself in the picture, you can mount the camera on a tripod and use the self-timer. It is also useful for close-up and copy works.

Self-Timer

The self-timer has 2, 6 and 10 second settings. During self-timer operation the timer LED flashes and the camera sounds an audible warning; at the end of 2 seconds, the speed of the warning indicators increases to let you know the shutter is about to release.

Mamiya ZE-X camera

1. Set the selector lever (E) to the desired interval setting (this may be performed either before or after film advance).

2. Focus and close the eyepiece blind to keep out stray light.

3. Press the shutter button. The shutter will release at the end of the preset interval. Should you change your mind, you may cancel timer operation by setting the switch back to its original position before the shutter releases.

· When use of the self-timer is no longer desired always reset the selector lever back to its original position or your next shot will also be on time release.

· The "B" setting of the shutter speed dial cannot be used for self-timer operation.


Eyepiece Blind

The eyepiece blind is a handy device that keeps stray light from entering the camera from the rear and adversely affecting exposures made without your eye to the viewfinder, such as exposure with the self-timer, close-ups and copy work or night photography.

Mamiya ZE-X camera

To close the blind: 
Slide the lever all the way to the right until the blind completely covers the eyepiece.


Multiple Exposures
Multiple exposures are easily made with the ZE-X because the handy multiple exposure lever automatically disengages the film advance system and also the exposure counter to keep accurate exposure count.

1. Make the first exposure in the normal manner.

Mamiya ZE-X camera

2. Slide the multiple exposure lever all the way to the right and hold. Wind the shutter by winding the film advance lever all the way.

3. Release the shutter for your second exposure on the same frame.

For additional exposures on the same frame, repeat steps two and three above.

Exposure Tips: 
With multiple exposures best results are obtained. if you photograph a dark subject first and superimpose lighter ones over it. Except for night scenes and fireworks, exposure compensation may be required depending on the brightness of your subject and the number of exposures being made as follows.

Caution:
 Although the multiple exposure system is designed to permit an unlimited number of exposures on the same frame there may be occasions when the film will slip slightly due to film slack.

Average amount of compensation required

Number of exposures on same frame 2 3 4
Effective compensation setting -1  -1 1/3    -1 2/3 -2


Depth-of-Field Control

When the camera is focused on a subject a certain area in front of and behind the subject is also in focus; this is called the depth-of-field. Depth-of-field varies in relation to the aperture in use; it increases as the aperture ring is stopped down to smaller apertures, and decreases as the lens is opened up to larger apertures.

Mamiya ZE-X camera

To render the background in sharp focus or for snapshots and candid photos where there isn't time for pin-point focus, stop the lens down to a small aperture, so the greater depth-of-field will give you greater overall focus for the picture area. To stand out your subject against its surroundings, open the lens up to a larger aperture, so the shallow depth-of-field will throw the back-ground out of focus.

Mamiya ZE-X camera

The depth-of-field range can be determined using the depth-of-field scale for the lens in use. First, select the desired aperture, then look at the corresponding figures on the depth-of-field scale on both sides of the central index dot. This is the extent of the depth-of-field that will be obtained with the aperture you are using. For example, if the camera is focused at 15ft (5m) at an aperture of f/11, the range of sharp focus will be approximately from 10ft (3m) to Soft (10m).


Infrared Photography

The red dot (or red line) to the right of the central index dot of the lens is the infrared mark. This mark is provided because focusing characteristics of the lens differ from ordinary films when using black and white infrared film. Compensation is required as explained below.  < If you are interested in IR photography, try a digital camera >

Mamiya ZE-X camera

1. After focusing the lens in the normal manner, read the distance indicated by the central index dot. Then, move the distance indicated so that it aligns with the infrared mark.

2. Attach a red filter over the lens, and set the exposure manually as indicated by the film instructions for infrared photography.

·  Focusing compensation is required only for black and white infrared films, not for color. Read the film instructions carefully for proper use of the filter.

Mamiya-Sekor EF/E Lenses


Mamiya ZE-X camera

<<<< Additional information not in the manual:  
I just wanted to point out that not all Mamiya M42 lenses are safe to use with the P adapter for the Auto-XTL. If you attempt to use the SX type lenses with the Auto-XTL P adapter, the aperture sensing pin will dig into the P adapter face since it is not perfectly flush with the outer surface edge of the SX lense. Furthermore, since the entire moving surface of the aperture ring of the SX lense comes to rest against the P adapter face, it will lock down the aperture control of the lense and make it impossible to turn, therefore preventing SX lens f-stop manipulation. Mamiya M42 AUTO lenses seem to be safe choices as are M42 Yashica-Yashinon, M42 Meyer-Optik and M42 Zeiss MC Sonnar (S) lenses. Any aperture ring that rotates at the extremity of a lens should be avoided. Of course the SX lens works perfectly well with the "ZE" P adapter for Mamiya ZE series lenses which it was designed for. Lenses with Auto and Manual switches like Zeiss MC Sonnar work well with the Auto-XTL P adapter in conjunction with its Auto Aperture pin. Lenses that have no Auto Aperture and only manual control of aperture appear to work equally well like Meyer-Optik Orestor M42.  
Robert A. Genna, Connecticut teacher and photographer  >>>>>>


System accessories ZE-X

Mamiyalite MZ 36R

Mamiya ZE-X camera This grip-type automatic electronic flash unit takes full advantage of the ZE-X's crossover mode feature and sophisticated electronic aperture control systems for flash photos with unprecedented ease and accuracy. The MZ 36R has a guide number of 36 (ASA 100 in meters) which is reduced to 28 when the wide angle diffuser is used.
The head of unit can be swung upward 90 and rotated almost one full turn, besides, the flash sensor is removable and may be attached directly to the camera hotshoe to permit bounce flash operation on auto. Used with the ZE-X, it automatically synchronizes for flash at 1/60 second on charging and used with EF lenses automatically selects the aperture to obtain proper exposure in relation to film speed and focusing distance. 

As the aperture may also be set manually and the flash sensor automatically controls flash intensity according to the light reflected from the subject, it may also be used with other cameras, including large-format cameras. In addition, you can select one of five different flash intensity for your purpose, so it is highly convenient for close-up work and daylight synchro flash. Other convenient features include a built-in shutter release button on the flash unit, plus electronic remote control and slave units for maximum convenience in remote or multiple flash photography using more than one flash unit.

Angle of coverage: 45 vertical, 60 horizontal (coverage down to a 28mm wide-angle lens for 35mm cameras with wide-angle diffuser attached). 
Power Source: Eight AA-size alkaline or rechargeable Ni-Cad batteries.


Mamiyalite MZ 18R

Mamiya ZE-X camera This clip-on type automatic electronic flash is highly portable and takes full advantage of the ZE-X's crossover mode feature and electronic aperture control to offer flash photos with the same ease and accuracy of the MZ 36R. The unit features a guide number of 18 (ASA 100 in meters) which is reduced to GN13 with the wide-angle diffuser attached. When used with the ZE-X, the unit automatically synchronizes for flash at 1/60 sec. on charging and flash ready indication is provided in the camera viewfinder. In addition, when used with EF lenses the camera will automatically select the aperture to obtain proper exposure in relation to subject distance and film speed. Moreover, the aperture may also be set manually and the flash sensor automatically controls flash intensity for proper exposure, permitting use with cameras other than the ZE-X.

Angle of coverage: 45 vertical, 60 horizontal (coverage down to a 28mm wide-angle lens for 35mm cameras with wide-angle diffuser attached). 
Power Source: Four AA-size alkaline or rechargeable Ni-Cad batteries.


Mamiyalite ZE

Mamiya ZE-X camera

This clip on auto flash unit features a guide number of 17 (ASA100 in meters) which is reduced to GN 12 with the wide-angle diffuser attached. It features two auto flash ranges plus manual flash override.
When using with the ZE-X, set the film speed on the flash unit and select either of the two usable apertures, it will automatically control flash intensity for proper exposure within the flash operating range. In addition, shutter speed automatically synchronizes at 1/60 sec. for flash on charging and flash ready indication is given in the viewfinder.

Note: When used with ZE-X use only the aperture priority AE or manual operation mode to ensure proper flash exposures. And also, the crossover switch should be set to FIX.

Angle of coverage: 45 vertical, 60 horizontal (coverage down to 28mm wide-angle lens for 35mm cameras with wide-angle diffuser attached).
Power source: Four M-size alkaline or rechargeable Ni-Cad batteries.

Mamiya Winder ZE

Mamiya ZE-X camera

Mounting the Mamiya Winder ZE on the camera eliminates the need to advance film manually. Photographic opportunities can be captured more easily because there is no need to take the eye away from the viewfinder for film advance.
Single frame photography is easy by simply removing the finger from the shutter release after each shot.

Continuous sequence photography is possible at the rate of approximately 2 frames per second by merely holding down the shutter release button.

In continuous shooting with the winder, the ZE-X is preferably set at either shutter speed priority mode or aperture priority mode with crossover AE mode, so that the camera can provides you the best possible exposure settings throughout changing lighting situation and shows the exposure data in the viewfinder. Incidentally, "M" indication of manual and "P" indication of programmed mode may not be shown, because those indications will be shown with a slight delay to appear in the viewfinder after the shutter is operated. Even if the indications are not appear in continuous shooting, the camera will be operated correctly.
Power source: Four AA-size alkaline or rechargeable Ni-Cad batteries.


Filters

Mamiya filters are made of high-quality optical glass to maintain the high performance of the camera lens. They are available in the following five types: SY48 (Y2), S056 (02), SL39 (UV), YG, and SL-1 B (skylight).

Lena Hoods ZE
Mamiya lens hoods are an important accessory for getting the best possible performance from the camera lens because they minimize the entry of stray light which can cause internal reflection and lead to flare or ghost images.
Always use the lens hood designed for the specific focal length of the lens being used.

Accessories

Diopter Correction Lenses ZE
Far- and near-sighted people sometimes find it difficult to focus a camera due to the optical characteristics of the viewfinder system. This situation, however, can easily be remedied by using a diopter correction lens and adapter.
These diopter correction lenses are available in six different strengths: +3, +2, +1, -1, -2 and -3.

· Before purchasing a diopter correction lens at your Mamiya dealer, be sure to actually try various strength diopter lenses and select the one that suits your eyesight.

1. Rubber Eye-cup ZE with Adapter 
This adapter is required for attaching the diopter correction lenses to the camera. The rubber eye-cup helps to prevent stray light entering the viewfinder while taking photographs.

Mamiya ZE-X camera

To attach the diopter correction lens, first remove the mounting ring located inside the eye-cup by turning it counter-clockwise; then put the lens in place and replace the ring.

2. Magnifier ZE
The magnifier is a useful aid for critical focusing as required in copy work, close-up photography, and similar applications. The size of the image is doubled and only the center part is visible for more accurate work. The magnifier also features diopter adjustment

3. Angle Finder ZE
The angle finder is useful when shooting at low angles and for copy work. Click stops are provided every 90, but full 360 rotation is possible for viewing even from the side or from below. The angle finder also features built-in diopter adjustment from -4 to +4.

4. Close-up lens ZE
The close-up lenses ZE are convenient attachment lenses which screw directly to the filter threads of the master camera lens enabling swift and easy conversion to close-up photography.
Two models are available: Close-up lens No. 1 having +2 diopters, and Close-up lens No. 2 having +4 diopters.

Mamiya ZE-X camera  Mamiya ZE-X camera Mamiya ZE-X camera


5. Auto Extension Rings ZE
A set of three extension rings are intended for close-up photography and mount between the camera body and lens, directly coupling with the ZE camera metering system and the lens automatic diaphragm. Three different lengths of the rings can be used individuality or in combination.

6. Auto Bellows ZE
This is an easy to operate, precision bellows type close-up attachment. Automatic aperture stop-down coupling is possible using a double cable release. And the front standard can be swiveled 360, permitting simple reversing of the lens for large magnification ratios with images that are sharp to the very edges.

Shift control also enables control of perspective. And the camera can also be rotated at the back for a choice of vertical or horizontal format with easy operation. The focusing rail allows the entire bellows unit to be shifted back and forth for sensitive adjustment of distance and focusing.


7. Slide Copier ZE
This device is mounted on the front of the Auto Bellows for making copies of slides. Convenient film trays are provided for copying film strips. The slide stage also moves vertically and horizontally for ; easier cropping of 35mm slides.

Mamiya ZE-X camera Mamiya ZE-X camera

8. Bellows Stand ZE
Used with the Auto Bellows, the Bellows Stand is used for copying small objects such as stamps, coins, insects, etc. Clips are provided for holding subjects on the platform.. And the platform rotates for precise positioning. The platform is also finished to provide 18% reflectance, convenient for measuring exposures. A clear glass platform is also included for backlighting of subjects.

Precautions on Batteries

The Mamiya ZE-X has a built-in circuit that automatically gives a warning when battery power is running low. In this case, the data display in the viewfinder flashes at the rate of 8 times per second when the shutter release button is lightly pressed.

· The batteries should be replaced as quickly as possible, although several exposures can still be made. When the batteries go completely dead, the viewfinder display will not light at all and the shutter will not be released.

· Batteries normally last for one year or more, but it is advisable to replace them once a year at least. Those who take large numbers of photographs should replace the batteries more frequently. Always be on the lookout for the flashing display warning.

· Batteries should always be removed when the camera is not be used for an extended time. Keep them in a cool, dry place. Leaving batteries in the camera for long periods may result in leakage which could damage the internal mechanisms.

· Always keep batteries out of the reach of children and never throw used batteries into a fire or expose to excessive heat.

· When going on trips be sure to carry spare batteries to ensure that the camera will function. Also, as batteries tend to temporarily malfunction at temperatures below freezing, when photographing in extremely cold climates, carry spares kept in a warm pocket to ensure continued operation should those in the camera malfunction. (The performance of batteries which malfunction due to cold will return to normal when batteries are exposed again to room temperature for several hours).

Batteries Replacement
When replacing batteries, use 1.5V alkaline batteries LR44 or silver oxide batteries SR44 (Eveready S-76, UCAR S-76, Ray-O-Vac RS-76, Mallory MS-76, or equivalent).

Although 1.3V mercury batteries are the same shape and size, they will not operate the camera normally.

Either alkaline or silver oxide batteries may be used as replacement, but always replace both together and do not mix brand and types, also, never mix old and new batteries.


Handling Cautions
Be sure that the shutter release button isn't pressed down when carrying the camera or when putting it away as the LED display will stay on and drain the batteries.

The depth of the tripod socket is 2-3/16 in. (5.5mm). If a tripod is used with a mount screw longer than this, the internal mechanisms of the camera may be damaged. Do not use excessive force when mounting the camera on a tripod.

Avoid strong vibration and shock since this may cause adverse influence on the delicately adjusted parts of the camera. Be careful not to drop the camera or allow it to strike against objects.

Do not keep the camera for extended periods where temperature is above 100 F (40 C) or below 5 F (-15 C), or where there is excessive humidity or salt in the air. The camera mechanism or film can also be damaged if the camera is left for a long time in a place where there is naphthalene or formalene gas. Always store color film at the designated temperature.

Never touch the surface of the mirror or lens with the hands. Any dust should be blown off with a blower or wiped off by lightly applying a soft cloth. Be especially sure to never rub the surface of the mirror.

Always clean the camera carefully after photographing at the beach or other place where there is salt in the air. Clean the many plastic parts by gently wiping with a soft, dry cloth. Never use solvents when cleaning.

Inspect the camera periodically when it is not being used. Be sure to inspect moving parts before trying to take important photographs. This includes the film advance and shutter operation, electronic flash synchronization, etc. Test shots should also be taken if possible to discover any irregularities that may exist. (Incidental damage which results in this camera malfunctioning will not be compensated.) Do not try to repair or lubricate the camera if some irregularity is discovered. Leave this to your Mamiya dealer.

Specifications:

Type of camera: 35mm Single Lens Reflex (SLR) multimode automatic exposure (AK) camera.

Mode of operation: Crossover mode (Shutter speed priority AK, Aperture priority AK, Programmed AK, Electronic flash AE with automatic crossover among these modes), plus full  manual override.

Picture format: 24mm x 36mm

Usable lenses: Mamiya-Sekor EF and E series lenses with Mamiya ZE bayonet mount.

Standard lenses: Mamiya-Sekor EF/E 50mm f/1.4, MamiyaSekor EF/E 50mm f/1.7 and Mamiya-Sekor E 50mm f/2.0.

Viewfinder magnification ratio: 0.86X with 93% horizontal and 91% vertical field of view (with 50mm lens at oo).

Viewfinder information: Full information display via LED digital readout at base of finder; aperture and shutter speed display, indications for crossover system, programmed AE mode, flash ready, EV variation and manual operation. Flicker of display warns incorrect exposures and incorrect operation at 2 Hz/sec., and low-batteries condition at 8 Hz/sec.

Focusing screen: Split-image/microprism with matte field.

Metering system: TTL center-weighted, open aperture metering with GPD (gallium photo diode).

Metering range: -3 - +18 EV (ASA 100 with 50mm f/1.4 lens).

Film speed range: ASA 6 - 3200 in 1/3 increments with lock.

Exposure compensation: REV in 1/3 stops (dial locks at 5eo'')

Exposure memory: Via shutter button/exposure memory button.

Shutter: Seiko M.F.C. type metal, vertically run electronic focal plane shutter.

Shutter speeds: Auto shutter speeds from 22 sec. - 1/1000 sec., manual speeds from 8 sec. - 1/1000 sec. in clickstop settings, plus B (all speeds electronically operated).

Shutter button: Electromagnetic release (activates all circuits by pressing the button partway).

Multiple exposures: Multiple exposure lever disengages film advance and exposure counter.

Self-timer: Electronically operated with 2, 6 and 10 sec. interval settings, features LED and PCV sound warnings.

Flash synch: X hotshoe synch at 1/60 sec.; auto synch on charging with Mamiya dedicated flash units.

Dedicated flash features: Full automatic flash photography possible using with Mamiyalite MZ; shutter speed and aperture automatically set when flash has charged.

Film advance: 130 winding angle, 30 stand-off angle.

Exposure counter: Auto resetting, additive type (disengages for multiple exposures).

Film rewind: Via crank and film rewind release button.

Back cover: Opens by pulling film rewind crank; removable, with memo holder.

Power source: Two 1.5V alkaline-manganese LR44 batteries or two 1.5V silver oxide SR44 batteries; activate meter and camera systems on pressing shutter button partway.

Other features: Eyepiece blind, winder/auto rewind-attachment provision, auxiliary shutter release contacts for electronic remote control. -

Dimensions: 139.5mm (W) x 89mm (H) x 50.5mm (D)

Weight: 470 grams (body only, without batteries)