Contax RTS
instruction manual

Contax RTS Bedienungsanleitung

Posted 11-29-02 / 5-29-2010

This camera manual library is for reference
and historical purposes, all rights reserved.
This page is copyright© by Butkus camera manual site,  M. Butkus, NJ.
This page may not be sold or distributed without
the expressed permission of the producer
I have no connection with any camera company
On-line camera manual library 

If you find this manual useful,
how about a donation of $3 to:


M. Butkus, 29 Lake Ave.,
High Bridge, NJ 08829-1701
and send your e-mail address
so I can thank you. 
Most other places would charge
you $7.50 for a electronic copy
or $18.00 for a hard to read Xerox copy.

This will help me to continue to host this site,
buy new manuals, and pay their shipping costs.

It'll make you feel better, won't it ?

If you use Pay Pal, use the link below.
Use the above address for a check, M.O. or cash.


Back to main camera manual page


 Click below for a PDF made directly from
 the manual - missing front / last page

Click here for Contax RTS PDF
version from these pages below


Click here for a Contax RTS PDF directly from the manual (5-29-'10)
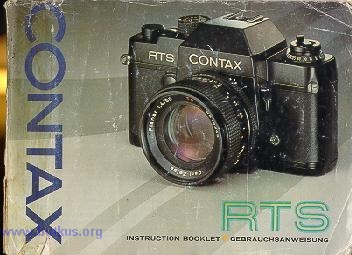
Contax RTS Bedienungsanleitung

Contax RTS camera
 

The CONTAX RTS is a, highly advanced electronic SIR system camera developed by mutual cooperation of Carl Zeiss, West Germany, and Yashica, Japan. It offers the advantage of the most sophisticated fully automatic through-the-lens exposure control. Designed under the theme of "Real Time" * functional 1 response and disposition of information, it provides such capability in al I fields of photography as could not possibility be expected of other 35mm SLR models. The New Bayonet Mount also a product of mutual cooperation between Carl Zeiss and Yashica - affords perfect coordination of the optical, mechanical and electronic systems. The exclusive 'Real Time' features are:

1. 'Real Time' LED Shutter Speed Display
By pressing the LED display button before or after film wind, the LED (light emitting diode) in the viewfinder will come on instantly to display the calibrated or in-between shutter speed ensuring correct exposure in relation with the preselected aperture.

Contax RTS camera 2. 'Real Time' Magnetic Release
Because this magnetic release trips the shutter through feather-touch fingertip action, camera shake at the critical moment of exposure is effectively prevented. Since, moreover, shutter tripping is accomplished through contact of an electric switch, all types of off-hand controls can be used directly. Correct exposure is obtained through 'Real Time' light reading immediately before exposure.


3. "Real Time' 1/2000 sec. Maximum Shutter Speed

Because your CONTAX RTS features an electronic focal plane shutter with a unique design under which the primary and secondary curtains uncap to provide starting from the same position, precise shutter speeds can be obtained up to the maximum of 1/2000 sec.

4. 'Real Time' Oft-Hand Controls
Because the magnetic release functions strictly on electrical principle, various types of electrically operated off-hand controls can be used directly by merely plugging into the camera's release socket. The off-hand controls currently available include the Infrared Controller Set and Interval Timer.

5. 'Real Time' Motor Drive System
The magnetic release does greatly more than just tripping the shutter. In the final stage of its function, it switches on the motor drive switch to provide -precise synchronization with the motor drive unit. Of the two types of motor drive units, the Real Time Winder is a compact unit which can be regarded as standard equipment of your CONTAX RTS.

6. 'Real Time' T* (T-Star) Carl Zeiss Lenses
-The high performance and extra-high speed design of the Carl Zeiss lenses, featuring the T* (T-Star) multi-layer anti-reflection coating which minimizes harmful glass-to-air reflections and assures 'Real Time color reproduction and contrast permit the photographer to select comparatively high shutter speed even in subdued light situations, thus offering new possibilities in 'Real Time' photography.

The CONTAX RTS is designed to deliver superb photographic results when mounted with any one of the Carl Zeiss or YASHICA lenses with Contax/Yashica mount. The manufacturer will not be held responsible for pictures of substandard quality when the same camera is used in combination with lenses other than those specified above.


* 'Real Time' is a computer terminology denoting absence of physical time-lag in disposition of information.


TECHNICAL DATA

Lens Mount: Contax/yashica Mount (three-claw bayonet mount) developed by mutual cooperation of Carl Zeiss, West Germany, and Yashica, Japan.

Lens: PLANER T** f/ 1.4 50mm standard lens composed of 7 elements in 6 groups, interchangeable with a wide range of high performance Carl Zeiss lenses.

Shutter: Electronic focal plane shutter of a unique design (primary and secondary shutter curtains uncap to provide starting from the identical position) * Electronic timing on both Auto and Manual * Shutter speeds continuously variable from LT (4 sec.) to 1/2000 sec. on Auto; 14 click stop settings from 4 to 1/2000 sec. and B on Manual * x sync terminal

Shutter Release: Feather-touch magnetic release *Release socket for cable switch and off-hand controls

Exposure Control: Through-the-lens automatic exposure control with SPD sensor above the viewfinder eyepiece taking center-weighted light reading * Fully automatic exposure through lens aperture preselection (exposure readout on manual operation) * LED shutter speed display in view finder * EV range from EV -1 to 19 (F1.4 at ASA 100) * ASA range from 12 to 3200 * Provision for exposure compensation (scale calibrated from x4 to X, 1/4 in between settings feasible) * Operates on 6V silver oxide or alkaline battery (Eveready 544, Ucar 544, Mallory PX28, Alkaline Eveready 537 or equivalent)

Viewfinder: Through-the-lens reflex viewfinder shows up to 92% of the actual picture area * Magnification ratio: 0.87X *

Pentaprism: silver coated and deflection mirror multi-layer coated to ensure maximum brightness of the viewfinder field.

Focusing :  screen interchangeable from the lens mount side

Viewfinder Display: 16-dot LED shutter speed display shows calibrated and in-between speeds
* Green shutter speed pointer overlaps 'A' setting on Auto and indicates shutter control dial setting on manual
*Aperture display shows maximum aperture of the lens in use on the extreme right and f-stop in use in green figure
* Exposure compensation tab appears when the exposure compensation pointer is set at any position other than 'X1'

Film Advance: Film advance lever advances film through a single 140 degree stroke or several short ratchet action
* Exposure counter resets automatically to start position when the back cover is opened

Film Rewind: Film rewind crank-handle with unique clutch action
* White line on top of the knob rotates to indicate proper film advance

Camera Back: Back cover opens when the film rewind knob is pulled all the way out
* Camera back interchangeable with Data Back or 250 Film Back (for use with motor drive unit)

Other Features: Multiple exposure through depression of the film rewind release button.
* Mirror lock lever * LED battery checker display
* Depth-of-field preview button
* Direct X contact shoe with anti-shock provision
* Motor drive coupling terminal and film advance coupler

Size & Weight: 142 x 89.5 x 50mm; approx. 700 grams (body only)

Contax RTS camera

Contax RTS camera

Contax RTS camera

Contax RTS camera

Contax RTS camera

1. Mount the lens. Set the lens properly in the mount by matching the red index dot on the lens barrel with that on the camera body, and give it a right turn until it click stops into place.

2. Install the battery.
Always use a 6V silver oxide or alkaline battery. Install the battery in the compartment with its minus (-) end in first.

3. Open the back cover and load the film.
Before film loading, turn the shutter control dial off the 'AUTO' setting. Close the back cover after ascertaining that the sprocket teeth properly catch the perforations along both edges of the film.

4. Advance the film.
By manipulating the film advance lever, advance the film until the exposure counter registers the figure '1'.
The film can be advanced by one frame through manipulation of the film advance lever in either one sweeping stroke or several small strokes.

Contax RTS camera

Contax RTS camera

Contax RTS camera

5. Set the film speed dial.
After loading the film properly, lift the collar around the film speed dial and align the index with the figure corresponding to the speed rating of the film in use.

6. Reset the shutter control dial to 'AUTO' setting.
Turn the shutter control dial and align the 'AUTO' setting with the index on the camera top. When thus adjusted, the green shutter speed pointer overlaps the 'A' setting of the shutter speed scale in the viewfinder.

7. Align the exposure compensation pointer with 'X1'
Turn the film speed dial and align the pointer with the 'X1' setting. Other settings are for exposure compensation in special

8. Preselect the lens aperture.
Turn the aperture ring of the lens and preselect the appropriate f-stop. The lens aperture can also be set by rotating the aperture ring while observing the aperture display in the viewfinder.

9. Compose and secure focus.
While sighting through the viewfinder, turn the focusing ring of the lens until your main subject appears clearly defined.

Contax RTS camera


Contax RTS camera
10. Check exposure.
While sighting through the viewfinder, press the LED display pushbutton and check the shutter speed set automatically in relation with the preselected lens aperture.

11. Hold the camera steady and press the magnetic release.
When shooting, use the Rubber Eye-Cup to ward off stray backlight.

Contax RTS camera

BASIC PROCEDURES OF OPERATION

The CONTAX RTS is designed to offer utmost ease and versatility of operation in all fields of photography. As long as the shutter control dial is kept at the 'AUTO' setting, fully automatic exposure is assured under all light conditions, merely through pre-selection of the lens aperture.

Read the following pages carefully and acquaint yourself with the basic procedure of operation before attempting to take your first series of photographs.

MOUNTING AND INTERCHANGING THE LENS

After removing the body cap and the lens rear cap, set the lens properly in the mount by matching the red dot on the lens barrel with that on the camera body. Then, give the lens a right turn until it click stops into place.

To prevent hitches in focusing and exposure control, always make sure the lens is locked properly in its mount.

Lens Interchanging
To remove the lens from its mount, twist it to the left while keeping the lens release button depressed.

Before removing, make it a rule to place the lens cap over the lens to prevent inadvertent scratching or smearing of the lens surface. After removing the lens from its mount, cover the rear end with the lens rear cap.

· Avoid direct sunlight when interchanging lenses, particularly in case the camera is loaded with film.

· Set the body cap in the lens mount in case the camera is to be left without it's lens.

Contax RTS camera

Contax RTS camera

Contax RTS camera
CAUTION

The shutter system and the exposure control of your CONTAX RTS will not function unless the battery is properly installed.

Always use a 6V silver oxide or alkaline battery (Eveready 544, Ucar 544, Mallory PX28, Alkaline Eveready 537 or equivalent).

1. Open the battery compartment cover by turning it with the edge of a coin.

2. Install the battery with its minus (-) end facing inside, and close the battery compartment cover.

When the battery power declines below the required voltage level, the shutter will fail to operate. Therefore, make it a rule to check the battery power (1 ) occasionally before shooting and (2) after replacing the battery.

To check the battery power, press the battery checker button. If the LED battery checker display comes on, sufficient power is indicated. In the event if fails to come on, replace the battery.

· When the battery power drains to a low level, the LED battery checker display may come on momentarily when the battery checker button is depressed. In such a case, replace the battery.

Contax RTS camera


FILM LOADING

Contax RTS camera
Avoid direct sunlight when loading the film.

1. After sliding up the rubber eye-cup, open the back cover by pulling out the film rewind knob. As soon as the back cover is opened, the exposure counter will reset to 'S' (start position).

2. Place the film cassette in the film cassette chamber and push the film rewind knob back to its original position.

· Use a standard 35mm cassette film of 12, 20 or 36 exposure load.

Contax RTS camera

3. Clip the film tip on the take-up spool as illustrated.

· Avoid inserting the film tip farther than is necessary.

4. After making sure that the shutter control dial is set at a position other than the 'AUTO' setting, advance the film until the sprocket teeth properly catch the perforations along both edges of the film. Then, close and press the back cover until it locks into place.

5. Fold out the film rewind crank-handle and turn it in the direction of the arrow to take up the film slack.
Contax RTS camera


Contax RTS camera
* When folded, the crank-handle will rotate freely; therefore, make sure it is returned into the compartment above the 'AUTO' setting.

6. Press the magnetic release and advance the film, alternately, until the exposure counter registers the figured'

If the white line on the film rewind knob rotates when the film advance lever is manipulated, it means the film is advancing properly.

CAUTION

Avoid keeping the LED display pushbutton depressed when advancing the film. Particularly in case the Real Time Winder is in use, make it a rule to keep your finger off the LED display pushbutton when making exposure.

Contax RTS camera


SETTING FILM SPEED

After the film has been loaded properly, set the film speed dial according to the speed rating of the film in use.

To set the film speed, lift and turn the collar around the film speed dial and align the index with the figure corresponding to the ASA or DIN rating of the film in use.

· Always see to it that the index is set properly in the click stop position. If set improperly, the accuracy of the exposure control will be affected.

ASA/DIN Film Speed Rating
The ASA or DIN film speed rating specified on the outer box or in the instruction sheet which comes with the film indicates the degree of light sensitivity of the film emulsion.

Contax RTS camera


Contax RTS camera
The film can be advanced by one frame by giving the film advance lever one sweeping stroke or several short strokes. In either case, make sure that the lever is manipulated until it fails to move any further.

Manipulation of the film advance I ever to advance the film automatically registers count of exposure on the exposure counter.

· The magnetic release will fail to function if the film wind is incomplete. In case it fails to operate, manipulate the film advance I ever once again to complete the film wind.

How to check the film advance.

If, in the course of film winding, the white line on the film rewind knob rotates accordingly, it is an indication that the film is advancing properly.

Contax RTs camera


The viewfinder of your CONTAX RTS shows the field covered by the lens in use always at the maximum aperture. In addition to the bright field, it provides preview of all necessary information for obtaining correct exposure.

Microprism focusing spot
The standard viewing screen features a microprism center focusing spot which affords precise focusing most readily. For details on how to secure focus, refer to the pertinent section.

Aperture display
The figures along the top edge of the finder frame denote the f-stops. The complete scale consists of 1.2, 1.4, 2, 2.8, 4, 5.6, 8, 11, 16, 22 and 32 settings. When the lens is mounted properly, the scale shifts to the right or left, correspondingly, to display the maximum aperture of the lens in use always on the extreme right.

When the aperture ring of the lens is turned, the green pointer moves to display the preset aperture in green figure.

Shutter speed display
When the LED display pushbutton is depressed before or after film wind, the LED dot comes on to display the shutter speed ensuring correct exposure in relation with the preselected aperture. If the LED dot comes on within the range of 2000 (1/2000 sec.) and LT (4 sec.), correct exposure can be obtained as long as the shutter speed dial is set at the 'AUTO' setting.

If the LED dot comes on in alignment with 'A' or 'B', incorrect exposure is indicated; therefore, the lens aperture and/or shutter speed setting must be readjusted accordingly.

When the green pointer overlaps the 'A' setting, it means that the camera is set for fully automatic exposure. In case the shutter control dial is adjusted to any position other than the 'AUTO' setting, the green pointer will overlap the figure corresponding to the shutter control dial setting.

Exposure compensation tab
When the film speed dial is turned and the exposure compensation pointer is aligned with any setting other than 'X1', this tab appears on the lower edge of the finder frame to signal that exposure compensation is being made.


FOCUSING

Contax RTS camera

To secure focus, turn the focusing ring of the lens while sighting through the viewfinder until the main subject appears clearly defined. The microprism focusing spot at the center of the finder field affords utmost convenience and ease in focusing. Precise focus is secured when the multiple glitter disappears and the image of the subject within the focusing spot appears sharp and clear.

· The viewfinder of your CONTAX RTS affords viewing and focusing always at maximum aperture. To check the depth of field after securing precise focus, simply push in the depth-of-field preview button.

The method of focusing remains the same regardless of what type of lens or combination of the Auto Extension Tubes is used.

· When necessary, the standard screen featuring the microprism focusing spot can be interchanged with any one of the four types of focusing screens available as optional accessories

Contax RTs camera


SHOOTING POSTURE

Otherwise perfect shots are often spoiled by erratic movement of the camera at the critical moment of exposure.

Make it a rule to support the camera firmly with your left hand and, while gently gripping the camera body with your right hand, press the magnetic release with the ball of your right index finger. Also, see that you are fully acquainted with the proper procedure of operation of your camera.

· Depending on how you wish to compose your picture, you can hold your camera in either horizontal (top photo) or vertical (bottom photo) posture.

· When required, steady your camera by holding it against a wall or tree.

When a telephoto lens is use or when shooting at a slow shutter speed, the use of a tripod to support your camera is recommended.

Contax RTS camera

AUTOMATIC EXPOSURE

Your CONTAX RTS features fully automatic through-the-lens electronic exposure control.

By simply presetting the film speed and lens aperture, its highly sophisticated electronic circuit functions to vary the shutter speed continuously and automatically according to the subject brightness, thus ensuring correct exposure under any light condition.

Besides fully automatic exposure control through aperture preselection, your CONTAX RTS provides semi-automatic exposure control through pre-selection of the shutter speed.

Automatic exposure through aperture preselection

1. Turn the shutter control dial and align the 'AUTO' setting with the index on the camera top.

When thus adjusted, the green shutter speed pointer in the viewfinder will overlap the 'A' setting.

· Make sure the exposure compensation pointer is aligned with 'X1 '.

Contax RTS camera
Contax RTS camera
Contax RTS camera
2. Preselect the lens aperture. Turn the aperture ring on the lens barrel and align the required f-number with the index. The preselected aperture will be displayed in the viewfinder in green figure. Refer to the table for approximate aperture setting under different light conditions.

Aperture Setting Guide

 Light Condition
 Outdoors under bright sunlight
Outdoors under overcast
Indoors or night photography
F-stop
16, 11, 8
5.6, 4, 2.8
2, 1.4

Above F-stops to be used when ASA 100 film is in use.


3. Press tag LED display pushbutton while sighting through the viewfinder.

Depression of this pushbutton provides a check of exposure condition before or after film wind.

If the LED dot comes on within the range of 2000 (1/2000 sec.) and LT (4 sec.), it indicates that correct exposure will be obtained at the preselected aperture.

In case two LED dots appear, it is an indication that an in-between shutter speed will be set automatically.

Contax RTS camera

Contax RTS camera

Contax RTS camera

· One LED dot indicates automatic setting of the shutter speed corresponding to the figure in alignment. Two LED dots indicate automatic setting of the shutter speed between the settings in alignment.
Contax RTS camera
4. Advance the film and press the magnetic release.

If the LED dot displays a shutter speed of 1/30 sec. or longer exposure, hold the camera steady to prevent erratic movement at the moment of exposure.

· When the magnetic release is depressed, the LED dot will come on momentarily to display the shutter speed at which exposure is being made.

· Correct exposure can be obtained through various combination of the lens aperture and shutter speed. Depending on the subject condition, therefore, alter the aperture setting to provide exposure at the right shutter speed.

· For best results, shoot your subject with the sun behind your shoulder


16 DOT LED SHUTTER SPEED DISPLAY

The shutter speed display incorporated in the viewfinder of the CONTAX RTS consists of a 16-dot LED (light emitting diode) array. The LED dot comes on immediately upon depression of the LED display pushbutton to display the shutter speed set in relation with the preselected lens aperture. This shutter speed display is unique in the fact that it can be turned on regardless of whether the film has been advanced or not. As explained in the foregoing pages, one LED dot indicates automatic setting of the shutter speed corresponding to the figure in alignment, while two LED dots signify in-between speed.

Under fluorescent light, more than two LED dots may sometimes come on at the same time. Although it is not perceptible to the human eye, there is a rapid fluctuation of the light intensity emitted by a fluorescent lamp and, because of the extremely high speed of response of the light sensor and the display, this variation of the light intensity is picked up, thus resulting in flickering of the LED dots which appears to our eyes as simultaneous lighting of three or more dots. This phenomenon does not, however, signify a malfunction. When the shutter is released, correct exposure will be made at the optimum shutter speed.

Contax RTS camera 1. When the LED dot comes on in alignment with a figure below '30', correct exposure will be obtained, but utmost precaution must be taken to prevent camera shake. To prevent erratic movement of your camera at the critical moment of exposure, (1 ) reset the aperture ring to a wider lens opening in order to provide automatic setting of a higher shutter speed, or (2) mount the camera on a tripod.
Contax RTS camera 2. When the LED dot comes on in alignment with 'A', stop down the lens aperture so that the LED dot aligns with 2000 (1/2000 sec.) or smaller figure.
Contax RTS camera 3. When the LED dot comes on in alignment with 'B' set the aperture ring to a wider lens opening. If the LED dot fails to move upward even at maximum aperture, resort to flash exposure.


Semi-automatic exposure through preselection of the shutter speed

Contax RTS camera

(Keep the shutter control dial at the 'AUTO' setting and the exposure compensation pointer aligned with 'X 1'.)

1. Press the LED display pushbutton and check the shutter speed.

2. While keeping the pushbutton depressed, turn the aperture ring until the LED dot aligns with the figure corresponding to the desired shutter speed.

The following table gives you a guide for preselection of the shutter speed:

Subject Shutter Speed
 Fast-moving subjects
Landscape or general outdoor
photography
Indoor or night photography
 1/2000, 1/1000, 1/500 sec
1/250, 1/125 or 1/60 sec.
1/30 sec. or slower speed

· When shooting sport scenes or moving automobile, set the shutter speed at 1/500 sec. or higher speed. The foregoing shutter speed preselection guide is based on using ASA 100 film.

Contax RTS camera


FILM UNLOADING

Contax RTS camera Make sure the exposed film is rewound into its cassette before unloading it.

1. When the exposure counter registers the figure equivalent to the exposure load of the film, avoid advancing the film any further. If forced, the film may tear away, making it impossible to rewind it into its cassette.

2. Give the film rewind release button on the camera base a push. This button will reset automatically when the film advance lever is manipulated; therefore, it is unnecessary to keep it depressed with your fingertip during film rewinding operation.

3. Fold out the film rewind crank-handle and turn it in the direction of the arrow. As soon as the crank-handle is rotated, you will hear an audible signal indicating that the take-up spool is turning in reverse and the film is being properly rewound into its cassette. When the film pulls away from the take-up spool, the audible signal will cease and you will feel an increased resistance; however, continue winding until the crank-handle rotates freely without resistance. Then, open the back cover and take out the film cassette.

· If the film fails to advance part way before the entire length has been exposed, do not attempt to wind it forcefully. Instead, push the film rewind release button and rewind the film into its cassette.

Contax RTS camera


FEATURE OUTLINE

Magnetic Release
Your CONTAX RTS features a magnetic release of a unique design which opens new horizons in system application.
Unlike the mechanical shutter release featured on other SLR models, this magnetic release trips the shutter instantaneously with minimal stroke and feather-touch fingertip pressure, thus preventing camera shake. It also permits direct use of various off-hand controls. Its principal advantages can be summarized as follows:

Contax RTS camera

1. It affords instantaneous tripping of the shutter.
The magnetic release system of your CONTAX RTS does not use a mechanical plunger with long operating stroke. Instead, it functions strictly on electrical principle and therefore trips the shutter instantaneously. When you press the magnetic release, you are in effect switching on the magnetic release circuit.

2. It permits direct use of various off-hand controls.
Because the magnetic release system works on electrical principle, it affords most convenient use of various off-hand controls, such as cable switches, infrared controller set and interval timer. Moreover, it provides precise synchronization of the shutter and motor drive operation, thus affording use of the motor drive unit at all shutter speeds range on Auto.

3. It ensures Real Time light reading.
The magnetic release system does not feature any provision for standby switching of the automatic through-the-lens light reading system. Simultaneously with the activation of the magnetic release system, the electric current flows to the electronic exposure control and Real Time light reading is taken immediately prior to mirror flip-up.

Contax RTS camera


Electronic Exposure Control
The electronic exposure control of your CONTAX RTS is based on through-the-lens light reading at full aperture. For light reading, an SPD (silicon photo diode) is used. This sensor responds to variation of light intensity at a speed several thousand times faster than the CdS cell used m most SLRs and shows high sensitivity in extremely low light levels. .

Light reading range
Your CONTAX RTS provides an extremely wide light reading range from EV -1 to 19 (F1.4 at ASA 100). EV (exposure value) denotes the value of exposure through combination of the shutter speed and lens aperture; the actual exposure to light of the film emulsion depends upon the speed rating of the film and the intensity of the transmitted light. For instance, if correct exposure can be obtained at EV 10 with ASA 100 film, the shutter speed must be adjusted one setting toward a slower speed or the lens aperture must be opened by one stop when using an ASA 50 film; therefore, the exposure valueatASA50will beEV9ifthelight condition remains the same and, at ASA 20.0, it will be EV 11.


MANUAL OPERATION

Contax RTS camera
On Auto, the shutter speed is set automatically according to the subject brightness and on the basis of the preselected lens aperture. It varies continuously and, therefore, provides precise exposure even at in-between speed. On manual operation, however, the shutter will not function at in-between speed settings.

Switch to manual operation in the following instances:

· When photographing by preselecting a precise shutter speed.

· In flash photography.

· In B (bulb) photography.

1. Turn the shutter control dial away from the 'AUTO' setting. The green shutter speed pointer will then move away from the 'A' setting in the viewfinder.

2. Set the required shutter speed setting in alignment with the index. When thus adjusted the green pointer will overlap the corresponding setting of the shutter speed scale visible in the viewfinder.

3. Press the LED display pushbutton and check the position of the LED dot.

4. Turn the aperture ring until the LED dot aligns with the preset shutter speed indicated by the green pointer.

Contax RTS camera
Contax RTS camera
5. When the LED dot is properly aligned with the green pointer, press the magnetic release to trip the shutter.

· On manual operation, the correct exposure can also be obtained through preseleclion of the lens aperture. In this case, preset the f-stop and then press the LED display pushbutton. While observing the position of the LED dot, turn the shutter control dial until the green pointer aligns with the dot.

· In case two LED dots come on simultaneously, turn the aperture ring until a single dot aligns with the green pointer.

· The 'B' setting is used for extremely long exposure. When the shutter control dial is set at 'B', the green pointer in the viewfinder will also overlap the 'B' setting.

When thus adjusted, the shutter will remain open over the duration the magnetic release is kept depressed.

To avoid camera shake when making exposure, mount the camera on a tripod or set it on a firm, plane surface and tri p the shutter by using a cable switch. Make sure the switch is pushed in properly. Lack of pressure on the switch may cause the shutter to close before the required exposure is given.


EXPOSURE COMPENSATION

Contax RTS camera
When shooting backlit or spot-lit subjects or when special effects are desired, turn the film speed dial and make exposure compensation by aligning the pointer with the required setting on the exposure compensation scale.

The exposure compensation scale has four click stop settings besides the X1 setting for normal exposure, namely, 4, 2, 1/2 and 1/4. The pointer can also be set at an in-between setting.

To make exposure compensation, turn the film speed dial and align the exposure compensation pointer with the required setting on the scale. When thus adjusted to a position other than the X1 setting, the exposure compensation tab will appear in the viewfinder to signal that exposure compensation is being made.
 

Contax RTS camera
Contax RTs camera · For backlit subjects, set the pointer at '2' or '4'.

When shooting against light or when photographing subjects against a background of a bright window or snow scene, your main subject will appear under-exposed if exposure is made in the normal manner. To bring out fine details of your main subject, align the exposure compensation pointer with the '2' or '4' setting on the scale.

· For spotlight subjects, set the pointer at '%' or "Gil'.

To prevent over-exposure of the main subject, align the exposure compensation pointer with the 'I' or '9~' setting on the scale.

· Make it ar Gletore set the exposure compensation pointer to the 'X1' setting.

· On manual operation, it is advisable to make the exposure compensation first and then adjust the exposure by aligning the LED dot with the green shutter speed pointer.

Contax RTS camera


SELF-TIMER

Contax RTS camera When you wish to include yourself in the picture or in case the shutter has to be tripped at a delayed action, use the self-timer.

1. Secure focus and advance the film.

2. Set the self-timer by pushing the self-timer lever all the way in the direction of the arrow.

3. To activate the self-timer, push the self-timer start lover in the direction of the arrow. The self-timer will then trip the shutter at a delayed action of approximately 7 to 10 seconds.

· When using the self-timer to trip the shutter, slide the rubber eye-cup mount upward as illustrated to prevent light from entering through the viewfinder eyepiece. By thus shielding the viewfinder eyepiece, exposure inaccuracy due to light filtering in from the eyepiece can be prevented effectively.

· In case the film wind is incomplete, the self-timer will activate when the self-timer start lever is pushed in the direction of the arrow but it will not trip the shutter. In such a case, give the film advance a complete wind and reset the self-timer lever.

· In case you decide not to use the self-timer after setting the lever in the direction of the arrow, simply return the lever to its original position.

· The shutter can be released in the normal manner by pressing the magnetic release even when the self-timer lever is set at the charged position.

Contax RTS camera

DEPTH-OF-FIELD PREVIEW BUTTON/MIRROR LOCK

Depth-of-Field Preview Button

Although the viewfinder of your CONTAX RTS always provides viewing at all aperture, depression of this button stops down the lens to the preselected aperture, thus enabling depth-of-field preview.

Avoid tripping the shutter while depressing the depth-of-field preview button because it will cause exposure inaccuracy.

Mirror Lock

In photomicrography and extreme close-up photography, better results can be obtained by making exposure with the deflection mirror locked in flip-up position.

To lock the mirror, turn the mirror lock lever to the right until the white line is set horizontal to the camera base. Then, push in the depth-of field preview button. The button will be locked in pushed-in state and the diaphragm will close down to the preselected aperture.

Before locking the mirror in flip-up position, compose, focus and make exposure adjustment.

After making the exposure, reset the mirror to its original viewing position. As soon as the mirror resets to its viewing position, the depth-of-field preview button will return to its original position. The mirror lock lever can be operated before or after film wind.
The automatic exposure control will not work when the mirror is locked in flip-up position.

Contax RTS camera
Contax RTS camera


FLASH EXPOSURE

Contax RTS camera
When making exposure with the aid of an electronic flash unit, turn the shutter control dial off the 'AUTO' setting and adjust it to 1/60sec. or slower speed setting.

Your CONTAX RTS features an X sync terminal.

1. Mount the electronic flash unit on the accessory shoe.

2. Connect the PC cord of the unit to the camera's sync terminal. With a unit featuring direct contact shoe, this step is unnecessary.

· The camera's direct contact shoe has anti-shock provision. Circuit contact is made only when the flash unit is properly mounted on the accessory shoe.

3. Adjust the shutter control dial to a setting providing perfect flash synchronization. (Refer to the following table for proper shutter speed setting.)

Shutter Speed Setting for Flash Exposure

Shutter Speed 1/60 1/30 1/15 1/8 1/4 1/2 1
Electronic Flash O O O O O O O
Flashbulb FP O O O O O O
M O O O O O O
MF O O O O O O

4. Secure focus, set the lens aperture and trip the shutter. After securing focus, read the subject distance off the distance scale and set the lens aperture according to the flash-to-subject distance (See following page for details).

· The basic procedure remains the same whether you use an electronic flash unit or a flash gun.
 

Contax RTS camera
Contax RTS camera
Correct Exposure Setting in Flash Exposure
Correct exposure in flash photography is determined on the basis of the guide number of the electronic flash unit or flashbulb in use. To obtain the aperture setting ensuring correct exposure, divide the guide number of the electronic flash unit or flashbulb in use by the flash-to-subject distance (in feet or meters).
(Guide Number Flash-to-Subject Distance = Correct Aperture) When the guide number is given in meters, convert the flash-to subject distance into meters and then divide.

Example with GN 20 electronic flash unit
When shooting a subject at a distance of 5meters by using an ASA 100 film and an electronic flash unit with a guide number of 20(ASA 100 in meters), the correct aperture will be:

20 (GN) DIVIDED BY 5 (Distance in meters) = 4 (F4)


INTERCHANGING THE CAMERA BACK/INFRARED PHOTOGRAPHY

Interchanging the Camera Back
The camera back of your CONTAX RTS can be interchanged with the Data Back or 250 Film Back available as optional accessory. Remove the camera back as illustrated while pushing down the back cover release lug.
Contax RTS camera
Infrared Ray Photography
In case of infrared ray photography, focus compensation must be made after securing focus in the normal manner by sighting your subject through the viewfinder, For focus compensation in infrared ray photography, use the R index on the lens barrel. After focusing in the normal manner, turn the focusing ring and align the subject distance with this R index.

· In case of infrared ray photography, always use a red filter.

Contax RTS camera

· For proper exposure setting, read the instruction sheet which comes with the infrared ray film carefully.

INTENTIONAL MULTIPLE EXPOSURES


The photographic technique under which exposure of the same or different subject is made more than once on the same frame is called intentional multiple exposure.

1. Trip the shutter and make the first exposure.

2. Give the film advance lever a full wind while keeping the film rewind release button depressed. By doing so, the shutter will be charged without advancing the film.

3. Press the magnetic release and make the second exposure. Repeat the same procedure if exposure is to be made more than twice on the same frame. Because, each time the film advance lever is given a full wind, the exposure counter will advance by one setting, keep track of the number of exposures made on the same frame.

For intentional multiple exposure, it is advisable to choose a dark background first and to superimpose a subject with a brighter background. Multiple exposure of subjects against an equally bright background will not come out too well.

Contax RTS camera

INTERCHANGING THE FOCUSING SCREEN

Contax RTS camera

Before interchanging the focusing screen, read the instructions supplied with each screen. Avoid touching the screen surface directly with your fingertip. Use a pair of tweezers. Also, take care not to touch the surface of the deflection mirror,

1. After removing the lens from its mount, pull the focusing screen release lug forward (see illustration). By doing so, the focusing screen frame will come loose, enabling you to remove the screen with the aid of a pair of tweezers.

2. By using a pair of tweezers, catch hold of the lobe on one edge of the focusing screen to be used instead of the standard screen, and place it right side up in the screen frame. Then, gently push up the frame until it locks into position.

CAUTION
Do not wipe the screen surface with cloth or tissue paper. In case dust, grit or lint has accumulated in the viewfinder, blow it away by using a blower brush, after removing the screen.

Contax RTS camera

Interchangeable focusing screens

Contax RTS camera Contax RTS camera

1. Split-Image Screen 2. Matte Screen

Sectioned Matte Screen 4. Cross-Scale Screen


DEPTH OF FIELD

Contax RTS camera
When the camera lens is focused on a certain objects in the foreground and background will appear acceptably sharp in the picture. The range over which the foreground and background objects are reproduced acceptably sharp is called the depth of field. The photos on this page were taken with the lens focused of the subject at the identical distance. At F1.4, objects in the foreground and background appear blurred but, at F16, they are reproduced sharp and clear. These photos illustrate that the depth of field increases as you stop down the lens.

· The depth of field can be determined either visually by pushing in the depth-of-field preview button or by reading off the depth-of-field scale on the lens barrel. When using the scale, secure focus and read off the range indicated by the identical figures on both sides of the index corresponding to the f-stop in use.

· The depth of field is more extensive (1 ) as you stop down the lens, (2) as you focus on a more distant subject, and (3) in the background rather than in the foreground.

Contax RTS camera


PRECAUTIONS

· Do not leave your camera in the trunk or g love compartment of your car or expose it to excessive heat. The battery as well as the camera mechanism may become adversely affected by the heat, sometimes making it impossible to obtain correct exposure.

When exposed accidentally to excessive heat, leave the camera to cool to normal ambient temperature.

· The most common causes of malfunction are exposure to humidity, salty sea breeze and subjecting the camera to knocks and jolts. To obtain faithful service, take good care of your camera and avoid rough handling.

· To clean the surfaces of the focusing screen, deflection mirror and lens, always use a blower brush. Do not touch these surfaces directly with your fingers. To wipe off smears on the mirror and lens surface, use a soft, lintless cloth. Take utmost precautions when cleaning the viewing screen surface.

· Keep the shutter in released state when your camera is not in use. lit possible, take out the battery from the battery compartment.

· Do not subject your camera to sudden changes in temperature. It may cause the electrical contacts to corrode and may bring about poor electrical contact.

· When installing the battery, make it a rule to wipe both ends clean. Oily smears on the contact surface may cause poor electrical contact.

· When the camera is to be left unused for any great length of time, take out the battery from its compartment.

· When going out on long tours, make it a rule to car spare battery.

· To prevent hazards, do not under any circumstances throw used batteries into an open fire.

Your CONTAX RTS is designed to function normally ambient temperature or +45 degrees to -10degre Because of the temperature characteristics of the battery in use, the battery checker display may fail to come c extremely low temperature. In such a case, replace battery with a new one.

Batteries which fail to work in low temperature will cover sufficient power when left for some time in normal ambient temperature.

For best results in extremely low temperature, the use an alkaline battery is recommended.